
Transform your space without emptying your wallet – these affordable living room updates deliver major impact for minimal investment.
Let’s be honest – we’ve all scrolled through Instagram and Pinterest, drooling over those perfectly styled living rooms that look straight out of a magazine. Then we check our bank accounts and… well, reality hits hard. But here’s the thing – you don’t need to spend thousands to create a space you love spending time in.
After helping my sister transform her sad rental living room into something genuinely gorgeous (on a shoestring budget!), I’ve become a bit obsessed with finding ways to make a big visual impact without spending big money. The best part? Most of these projects can be completed in a weekend, which means less time living in a construction zone and more time enjoying your refreshed space.
1. Paint Something (But Not Everything)
Paint remains the undisputed champion of budget decorating for good reason – nothing delivers more bang for your buck. But instead of painting all four walls (which takes forever and uses tons of paint), try these focused approaches:
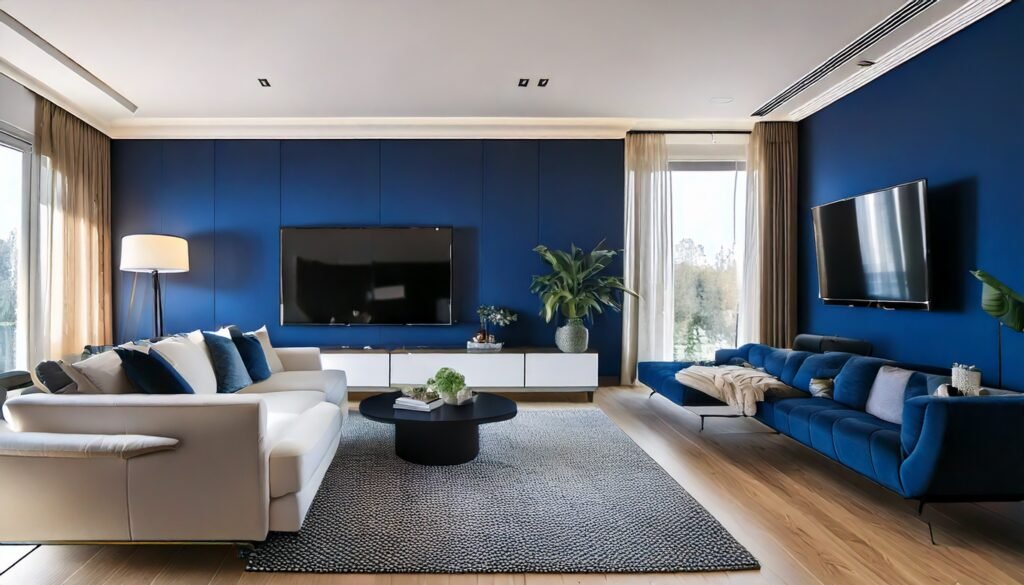
Accent wall magic: My neighbor Katie painted just her TV wall in a moody blue-gray (Sherwin-Williams “Mysterious Deep”), and visitors constantly ask if she’s remodeled her entire apartment. The depth it added made her basic white sofa look intentionally minimalist rather than just cheap.
Furniture refresh: That dated wood coffee table? Sand it lightly, add primer, and two coats of satin paint in a color you love. My own sad brown hand-me-down table got a new life in a soft sage green that now looks deliberately vintage-inspired rather than just old.
Pro tip: Most hardware stores now offer sample sizes of premium paints for under $10. For smaller projects like furniture, these samples often provide enough coverage and let you experiment with pricier paint lines you might not splurge on otherwise.
2. Rethink Your Layout (It’s Completely Free!)
Before buying anything new, try rearranging what you already have. You’d be amazed how different a room can feel just by changing the furniture placement.
When my friend Mark moved his sofa to the opposite wall and angled his armchair instead of having everything pushed against walls, his living room suddenly felt like a completely different space. His exact words: “It’s like I moved to a new apartment without the U-Haul trauma.”
Some layout principles to play with:
- Create conversation areas where people can actually talk to each other
- Don’t push every piece against a wall (floating furniture creates dimension)
- Consider traffic flow – make sure people can walk through easily
- Try positioning furniture to highlight architectural features or views
Grab a friend to help slide heavy pieces (or invest in $10 furniture sliders that make moving pieces across carpet or hardwood ridiculously easy).
3. Upgrade Your Throw Pillows (Without Buying New Ones)
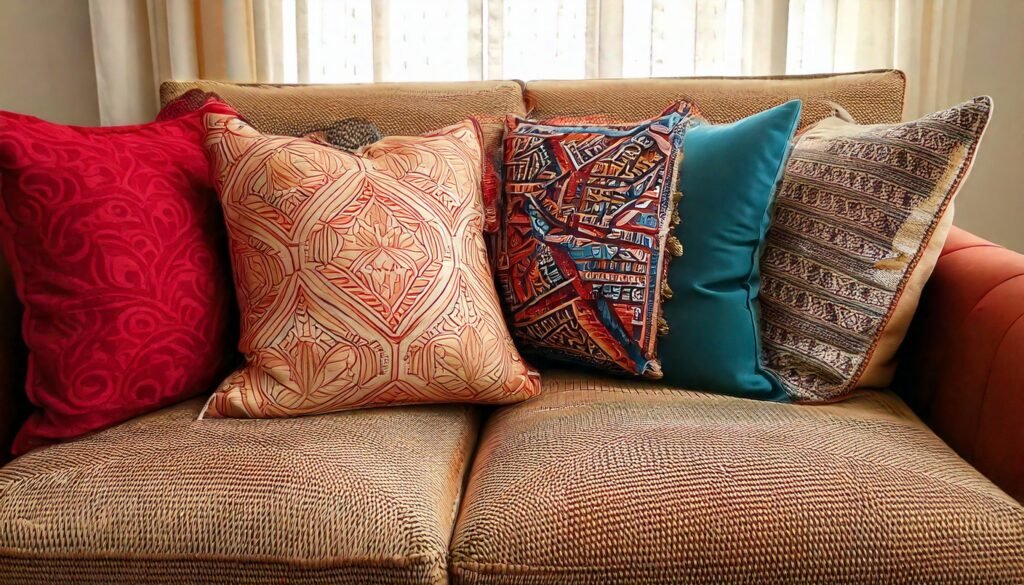
New decorative pillows can easily run $30-$50 each (highway robbery for what’s essentially a fabric square). Instead of buying new ones:
Pillow cover swap: I’ve become a huge fan of buying just the covers ($10-15 each) and reusing the inserts I already have. This also makes seasonal switches super affordable and storage a non-issue.
DIY no-sew options: Not crafty? No problem. I used iron-on hem tape to make covers from clearance fabric, and nobody can tell they’re homemade. If you can iron, you can do this.
Mix patterns deliberately: When choosing fabrics or covers, try this designer trick – mix three patterns using this formula: one large-scale pattern, one small-scale pattern, and one solid or texture. They’ll look curated rather than chaotic.
4. Add Strategic Lighting (That Isn’t the Dreaded Ceiling Light)
Nothing screams “sad rental” like relying solely on overhead lighting. Adding lamps at different heights creates ambiance and makes any space feel more layered and intentional.
After years of dealing with terrible lighting, I’ve learned that floor and table lamps don’t have to be expensive:
- Thrift stores often have great lamp bases for $5-15
- New shades transform dated lamps instantly
- Even big box stores have surprisingly decent options under $40
The real game-changer? Adding smart bulbs to existing lamps. When my budget was super tight, I splurged on just two smart bulbs ($25 each) that I could control with my phone and change the color temperature. Being able to switch from energizing bright light while working to a warm glow for evening movies made my living room feel like two completely different spaces.
5. Bring in Plants (Real or Fake – No Judgment)
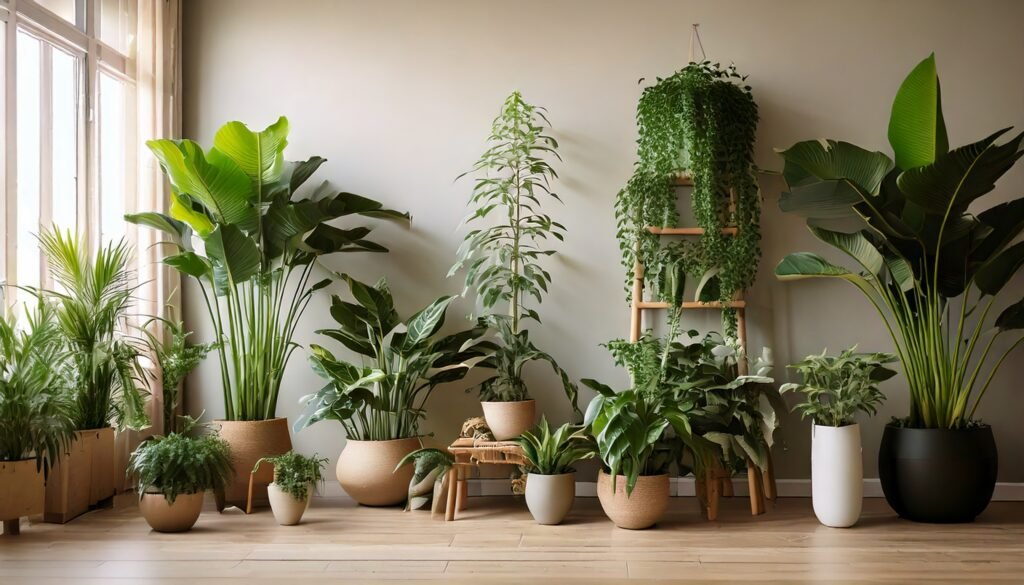
Plants add life, texture, and dimension to any space. If you’ve got a black thumb like I once did, start with nearly indestructible options like pothos, snake plants, or ZZ plants that thrive on neglect.
Can’t keep anything green alive? No shame in going faux. Fake plants have come a long way, and strategic placement makes them look much more realistic:
- Place them farther from seating areas (so no one’s examining them up close)
- Mix them with real easy-care plants if possible
- Dust them occasionally (seriously – this makes a huge difference)
When my sister insisted she couldn’t handle real plants in her low-light apartment, we found a gorgeous faux fiddle leaf fig for $45 (way cheaper than real ones anyway), and it instantly made her living room look more finished.
6. Create an Intentional Coffee Table Display
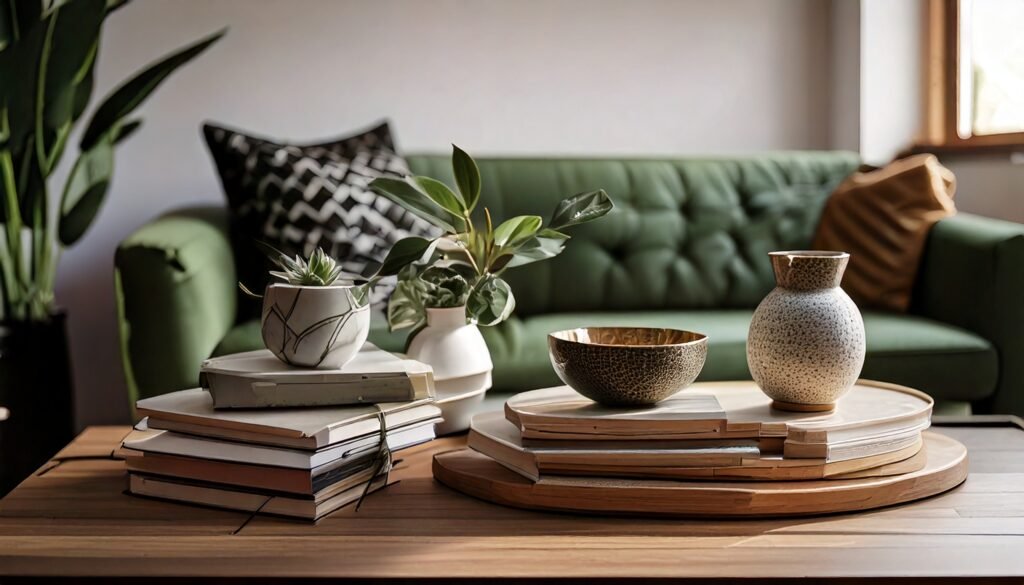
Styling your coffee table is free if you use items you already own, and it makes your space look deliberately designed rather than just lived-in.
The easiest formula that always works:
- Something tall (like a small plant or candle)
- Something flat (like a tray or coffee table book)
- Something personal (a small memento or interesting object)
My coffee table has a stack of three art books I love (collected over the years from museum gift shops), a small brass bowl that holds remotes, and a propagated cutting from my pothos plant in a simple glass jar. The whole “designed” look cost basically nothing.
7. Frame Everything (But Skip the Custom Framing)
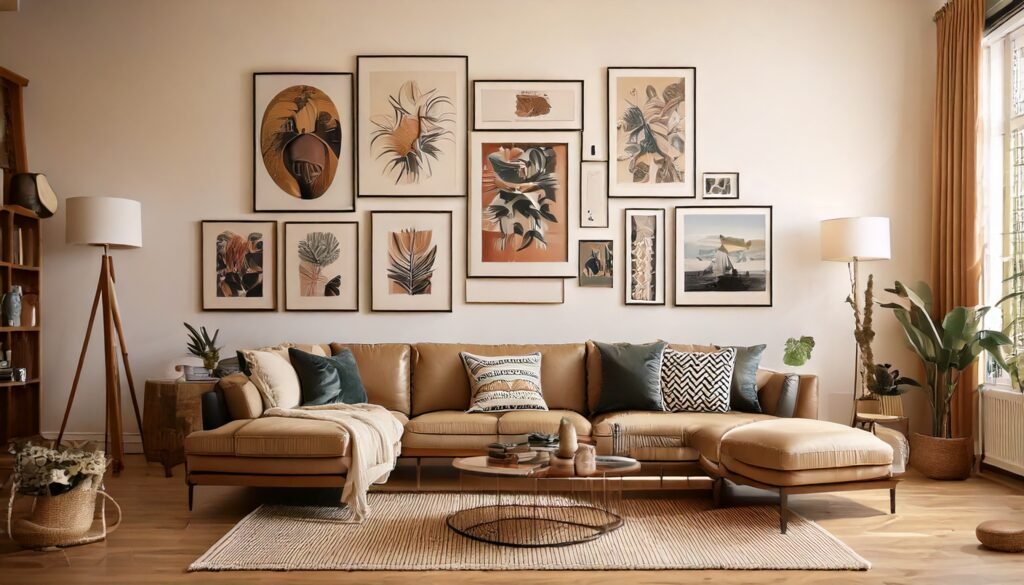
Nothing makes a space look more pulled-together than properly framed art, but custom framing is wildly expensive. Instead:
Standard size secrets: When buying or printing art, stick to standard sizes (8×10, 11×14, 16×20) that fit into ready-made frames. I scored beautiful wood frames at Target for under $20 each during one of their frequent home sales.
Unexpected art sources: Some of my most complimented art pieces came from:
- Old calendar pages (especially vintage travel ones)
- Digital downloads from Etsy ($3-8) printed at my local copy shop
- A beautiful cookbook with a damaged spine, carefully disassembled for the gorgeous photography inside
Mat magic: If you have oddly sized art, buy a pre-cut mat in a standard frame size instead of custom framing. It looks high-end for a fraction of the price.
8. Switch Out Your Hardware
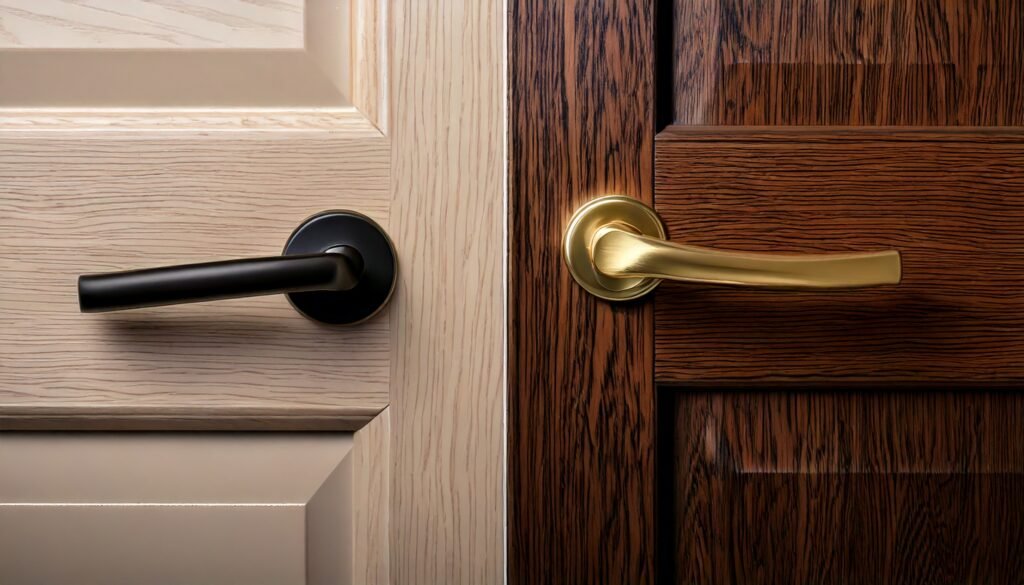
Swapping outdated cabinet pulls, doorknobs, or curtain rods takes minimal DIY skill but delivers impressive results.
When my friend Lisa moved into her rental with hideous gold-tone cabinet handles in the built-in living room storage, she spent $35 on matte black replacements that completely transformed the look. Since she kept the old hardware, she can easily swap it back when she moves out.
Hardware sources that won’t break the bank:
- Amazon Basics has surprisingly stylish options
- IKEA’s hardware section has modern options at unbeatable prices
- Home improvement store clearance bins often have discontinued styles at steep discounts
9. Introduce Texture Through Textiles
Texture creates visual interest and makes rooms feel cozy and layered. Adding different textiles is one of the most affordable ways to transform a space.
After painting my living room walls a crisp white, the space felt a bit sterile until I added:
- A chunky knit throw blanket draped casually over the sofa arm
- A small sheepskin rug tossed over my plain ottoman
- A single velvet pillow mixed with my existing cotton ones
The textural contrast instantly made the space feel more expensive and intentional without a single major purchase.
Budget-friendly texture sources:
- TJ Maxx/HomeGoods for affordable throws and pillows
- Facebook Marketplace for secondhand textiles (just wash before using)
- Repurposing – an unused scarf can become a table runner, a vintage fabric remnant can become a pillow cover
10. Hide the Tech
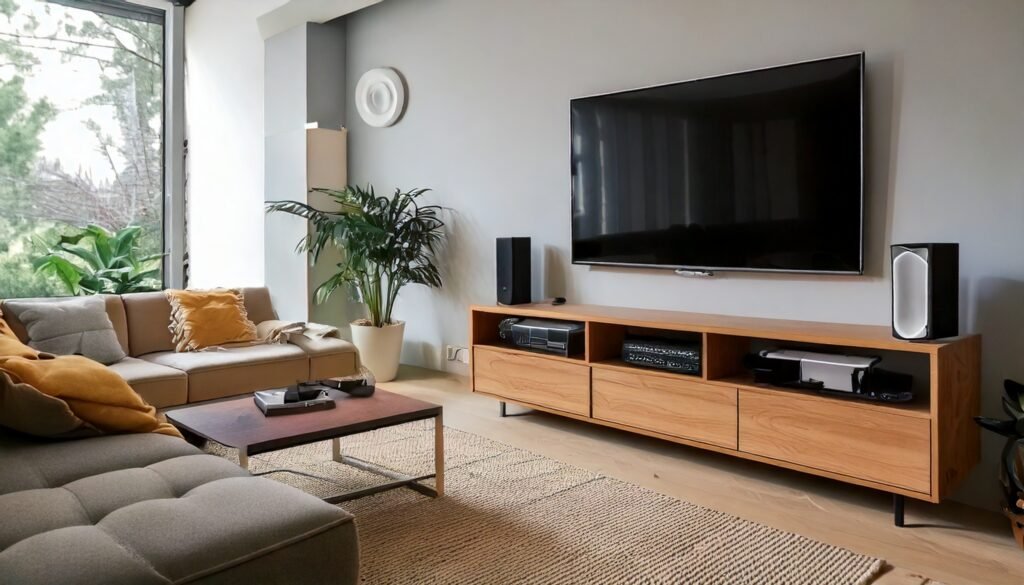
Nothing kills a carefully designed living room faster than visible cords, cable boxes, and blinking electronics. Spending a Saturday organizing the technical aspects of your living room costs almost nothing but increases the polish factor dramatically.
Simple solutions I’ve used:
- $8 cord covers painted the same color as my wall to hide TV wires
- A decorative box with a small hole drilled in the back to hide router and cords
- Velcro strips to attach power strips to the underside of furniture
My roommate still talks about how much nicer our space looked after I spent an hour corralling all our various charging cables and electronic eyesores into submission.
Small Investments, Big Impact
You don’t need to implement all ten of these ideas at once. Even incorporating just two or three can dramatically change how your living room looks and feels. Start with the options that address your biggest pain points – maybe it’s the terrible lighting, the lack of personality, or the uncomfortable layout.
After helping transform several friends’ living spaces on tight budgets, I’ve learned that the most successful room refreshes happen gradually. Take your time, be intentional with each small change, and enjoy the process. Your wallet (and your Instagram followers) will thank you.
Ready to Start Your Living Room Refresh?
Which of these budget-friendly updates will you try first? I’d love to hear about your before-and-after transformations in the comments. And if you have additional affordable decorating hacks, please share them!
FAQ: Budget-Friendly Living Room Updates
How long does it typically take to repaint a piece of furniture?
Most furniture painting projects can be completed in a weekend. You’ll need time for prep (cleaning and light sanding), primer coat, 2 coats of paint, and drying time between each step. I usually spread it over two days to allow for proper drying.
I’m in a rental. Which of these ideas won’t get me in trouble with my landlord?
Everything except painting walls can typically be done in rentals without issue. However, even wall painting can sometimes be negotiated – some landlords are fine with new paint as long as it’s well done or you agree to return it to the original color when moving out. Always check your lease and get permission in writing!
Where are the best places to look for affordable but stylish decor?
My go-to sources include: HomeGoods/TJ Maxx/Marshall’s, Facebook Marketplace, thrift stores, Target clearance sections, and end-of-season sales at places like West Elm and Crate & Barrel. Online, check out Wayfair’s daily deals and Overstock’s clearance section.
How do I know if my furniture arrangement is working?
A good furniture layout should: facilitate conversation (seats shouldn’t be more than 8 feet apart), allow for easy movement through the space, create a clear focal point, and feel balanced in the room. If something feels off, take a photo of your space – viewing it in 2D often helps identify layout issues more clearly than when you’re standing in the room.
I have no design skills. Where should I start?
Start by collecting images of rooms you love (Pinterest is perfect for this). After you’ve saved 15-20 images, look for patterns – what colors, styles, or elements appear repeatedly? This will help you identify your personal style and give you direction. Then begin with just one change from this list – paint is usually the most transformative first step.