
So you’re staring at your tired bathroom thinking, “I can’t stand those 90s tiles anymore, but I don’t have thousands to spend on a renovation.” Trust me, I’ve been there! Three years ago, my bathroom was stuck in a time warp with forest green fixtures and peeling wallpaper. In this comprehensive DIY bathroom makeover on a budget guide, I’ll share everything I learned from transforming three different bathrooms without breaking the bank. After getting quotes that made my eyes water, I decided to tackle it myself and discovered just how much you can transform with some elbow grease and smart planning.
This guide isn’t just a collection of pretty Pinterest ideas that leave you wondering how to execute them. I’ve broken down the entire process into manageable steps based on what I’ve learned from renovating my bathroom (plus helping two neighbors with theirs). I’ll share where I wasted money, what shortcuts worked, and how to avoid the mistakes that had me making emergency hardware store runs at 9 PM.

Planning Your DIY Bathroom Makeover on a Budget
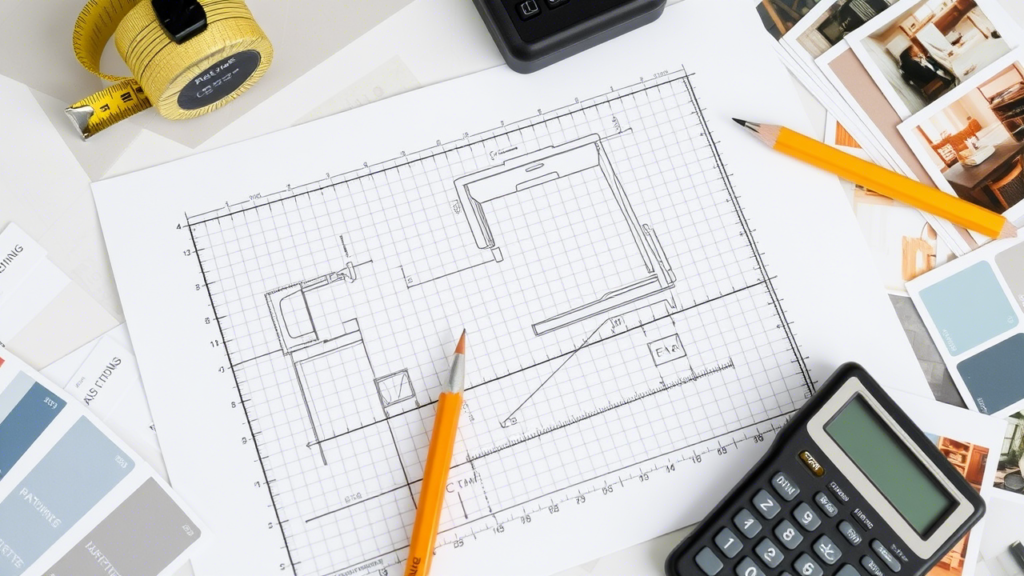
Before you rip out that dated vanity or start shopping for fixtures, grab a notebook and spend some time planning. This might seem boring when you’re itching to get started, but trust me—it’s the difference between finishing in a weekend versus living with an unusable bathroom for a month.
Setting Your Budget (And Actually Sticking To It)
Let’s be real about money for a minute. Bathroom renovations have a sneaky way of expanding beyond your budget. My $600 “simple update” crept toward $850 because I hadn’t accounted for all the little things—caulk, paintbrushes, and those “might as well” moments when you’re already elbow-deep in the project.
Start by deciding your absolute maximum budget, then subtract 15% for unexpected issues. Seriously. Set that money aside and pretend it doesn’t exist until you hit a snag. For a basic refresh (paint, hardware, fixtures), you can make a significant difference for $200-300. A more involved update with some DIY tiling or flooring might range from $500-1000, while tackling a vanity replacement and more substantial changes could push you into the $1000-1500 range.
When my sister did her bathroom, she kept a running spreadsheet of every purchase, even the $3.79 tube of caulk. Overkill? Maybe. But she was the only one of us who came in under budget. For more budget planning tools, check out Home Depot’s Budget Calculator, which helps estimate materials based on your bathroom size.
Figuring Out What You Need vs. What You Want
Your existing bathroom probably has elements that genuinely need addressing (leaky faucet, cracked tile) and things you just don’t like (the color, outdated fixtures). Make two lists:
- Must-Fix Items: These affect functionality or could cause damage
- Want-to-Change Items: These are mostly aesthetic concerns
For example, my must-fix list included repairing grout that was crumbling and replacing a leaky faucet. My want-to-change list had the dated light fixture, wall color, and towel bars. I tackled the must-fix items first, then used my remaining budget for the want-to-change items, prioritizing those with the biggest visual impact.
If you’re concerned about potential water damage in your bathroom, our internal guide on Water Damage Prevention and Repair can help you identify early warning signs before they become expensive problems.
Finding Your Style Without Going Down a Pinterest Rabbit Hole
I spent way too long collecting bathroom inspiration, to the point where I was paralyzed by options! Learn from my mistake and limit yourself to one hour of browsing. Save 5-10 images that speak to you, then look for common elements (colors, styles, materials).
Some budget-friendly sources for inspiration:
- Instagram accounts like @budgetbathrooms and @diyonabudget
- The “budget renovation” section on Apartment Therapy
- Thrift store and discount home decor shops (to see what’s affordable AND appealing)
When I helped my neighbor with her bathroom, she was torn between several different styles. We printed out her favorite inspiration photos and noticed she consistently gravitated toward brushed nickel hardware and blue-gray colors—that became her design foundation.
Measuring Twice (Actually, Three Times)
Nothing wastes money faster than buying the wrong-sized materials. Grab a tape measure and record:
- Total room dimensions (length, width, height)
- Window and door measurements and locations
- Distance between plumbing fixtures and electrical outlets
- Existing vanity and toilet dimensions
I learned this lesson the hard way when I bought a vanity top that was 1/2 inch too wide, which I didn’t discover until I’d already removed the old one at 7 PM on a Saturday. Not fun!
Tools You’ll Need (Not the Entire Hardware Store)
You don’t need professional-grade tools for most bathroom updates, but don’t skimp on the essentials:
- Basic tool kit (hammer, screwdrivers, pliers, level)
- Caulk gun and good-quality caulk
- Paint supplies (rollers, brushes, drop cloths)
- Utility knife with fresh blades
- Measuring tape (a good one, not that wobbly dollar-store version)
For my first bathroom project, I borrowed a wet saw for tile cutting from a friend. For my second bathroom, I realized renting one for $35/day was cheaper than buying a $150 saw I’d rarely use again. Don’t be afraid to rent specialty tools! Check out our article on DIY Tools Every Homeowner Needs for a complete list of must-have tools for home renovation projects.
Budget Breakdown: Where to Spend on Your DIY Bathroom Makeover
Let’s get specific about where your money goes in a DIY bathroom makeover on a budget. Understanding this helped me make smarter decisions about where to splurge and where to save.
What Things Cost (Not What the TV Shows Claim)
Based on my three DIY bathroom projects, here’s what you can realistically expect to spend:
- Paint: $30-60 (including primer and bathroom-specific formula)
- New faucet: $50-150 (basic models that still look good)
- Light fixture: $40-100
- Mirror: $30-150
- Shower curtain and hardware: $30-60
- Towel bars/toilet paper holder: $15-40 each
- New toilet: $100-250 (plus another $20 for wax ring, bolts, etc.)
- Basic vanity: $200-500 (more if you want stone tops)
- Flooring: $100-300 for a small bathroom (vinyl plank or basic ceramic tile)
My friend Karen did an entire bathroom refresh for $180, focusing solely on paint, hardware, and textiles. Meanwhile, I spent $600 on my guest bath because I replaced the vanity and lighting. Both bathrooms look dramatically better than before.
Materials: Where to Splurge vs. Where to Save
After three bathroom projects, here’s what I’ve learned about where to invest your limited budget:
Worth spending more on:
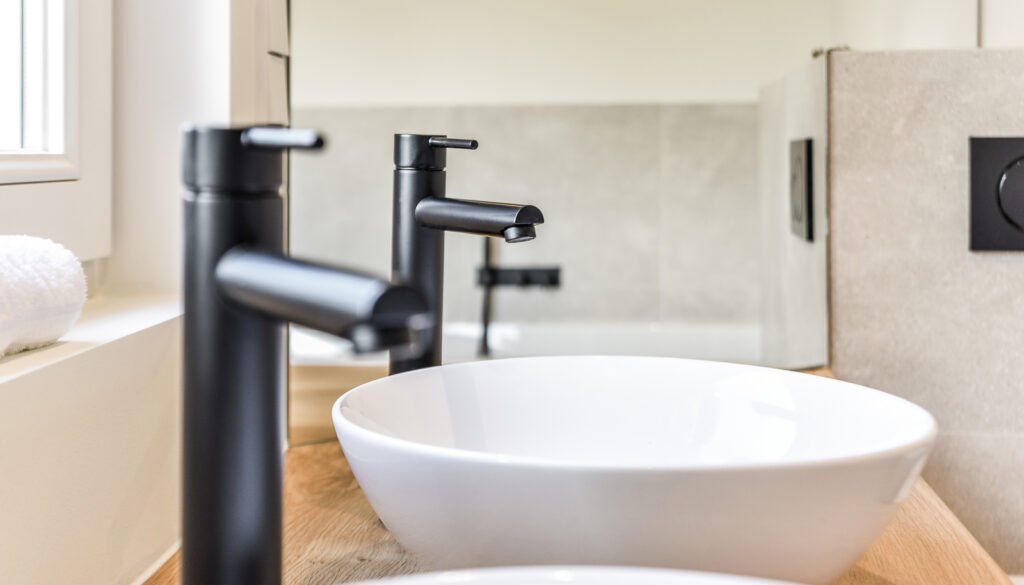
- Faucets (cheap ones often leak sooner)
- Paint (good bathroom-grade paint resists moisture better)
- Basic tools (they’ll last through multiple projects)
Where to save:
- Decorative items (target, discount stores, and thrift shops are gold mines)
- Cabinet hardware (spray paint can transform existing pulls)
- Light fixtures (discount home stores have surprisingly good options)
I initially bought a $25 faucet for my bathroom refresh, only to replace it a year later when it developed a slow leak. The $85 replacement has been perfect for three years now—sometimes cheaper costs more in the long run.
The DIY Time Investment (Be Honest With Yourself)
The other budget factor is time. If you’re new to DIY, multiply your time estimate by 1.5. For my first bathroom, I thought painting would take one evening—it took two, plus touch-ups the next day.
Approximate time investments for common projects:
- Painting walls: 1 day (including prep and cleanup)
- Replacing a vanity: 4-8 hours (longer if plumbing adjustments are needed)
- Installing new flooring: 1-2 days for a small bathroom
- Replacing toilet: 2-3 hours
- Updating hardware and accessories: 2-3 hours
My brother-in-law tried to rush through his bathroom update in a single weekend. He ended up with sloppy paint lines and an improperly installed toilet that rocked slightly. Take your time—it shows in the final result.
Quick-Win Bathroom Updates on a Tight Budget
Some bathroom improvements deliver a massive visual impact with minimal time and money when planning a DIY bathroom makeover on a budget. Start here if your budget is tight or if you’re new to DIY projects.
Paint: The Magical Transformation Tool
Nothing—and I mean nothing—changes a space more dramatically for less money than paint. My outdated beige bathroom became fresh and modern with a $42 gallon of paint and a Saturday afternoon of work.
For bathrooms specifically:
- Use paint with a satin or semi-gloss finish (it handles moisture better)
- Don’t skip the primer, especially over glossy surfaces or dark colors
- Consider painting the ceiling the same color as the walls in a small bathroom to make it feel larger
- Allow extra drying time between coats in humid bathrooms
And yes, you can paint ceramic tile! I transformed my aunt’s dated pink bathroom tile with specialized tile paint. Two years later, it still looks great. The key is meticulous cleaning and preparation—I spent more time prepping the tile than actually painting it. Better Homes & Gardens offers an excellent guide to selecting bathroom paint colors that can help you choose the perfect shade for your space.
Hardware: Small Pieces, Big Impact
Replacing cabinet knobs, towel bars, and even hinges can modernize your bathroom for under $50. This was the very first update I made in my bathroom, and the results were immediate.
When my friend Lisa wanted to update her bathroom on a shoestring budget, we simply spray-painted her existing gold hardware with oil-rubbed bronze paint. Total cost? $8 for the spray paint, and it’s held up beautifully for over a year.
If your toilet handle is yellowed or your sink drain is corroded, replacing these small elements costs less than $20 and instantly makes everything look fresher.
Lighting: Banish Those Builder-Grade Fixtures
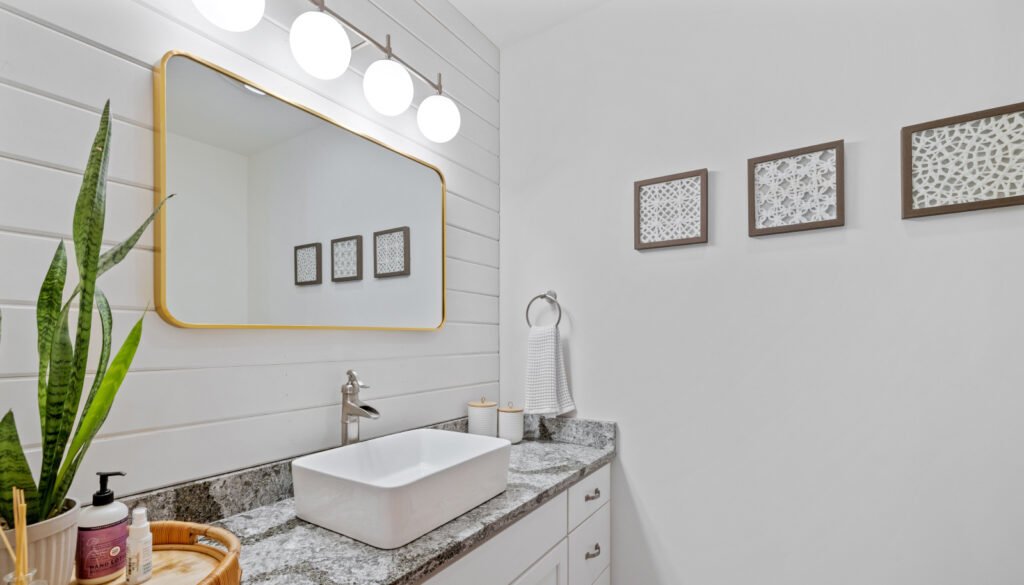
Most builder-grade bathrooms come with those awful strip lights above the mirror. Replacing mine with a simple three-light vanity fixture changed the entire feel of the room and cost just $65.
Lighting tips I wish I’d known sooner:
- Buy “daylight” bulbs for the most flattering light when getting ready
- Consider a dimmer switch for evening relaxation (about $15 at home stores)
- Clean existing light fixtures thoroughly before deciding to replace them—sometimes, dust and grime make them look worse than they are
- Look for floor models or open-box lighting at home improvement stores (I got mine for 40% off because it was a display)
For detailed guidance on selecting the right bathroom lighting, check out our in-depth article on the Bathroom Lighting Selection Guide.
Shower Curtains and Textiles: Don’t Underestimate Fabric
In my first bathroom update, I was focused on “hard” elements like tile and fixtures. But when my designer friend visited, she immediately suggested a new shower curtain, coordinating towels, and a small rug. The difference was stunning for less than $75.
For maximum impact:
- Choose a shower curtain first, then pull accent colors from it for towels and accessories
- Hang the curtain higher and wider than you think (it makes the room feel larger)
- Consider double shower curtains for a more luxurious feel
- Fresh white towels can brighten any color scheme and can be bleached back to perfection
My mom’s 1970s bathroom got a complete refresh with just a new shower curtain, coordinating hand towels, and a matching soap dispenser. The avocado green toilet suddenly seemed intentionally retro rather than outdated!
The Bigger DIY Bathroom Makeover on a Budget Projects
Ready to tackle something more substantial? These projects require more time and skill but are still achievable for a determined DIYer.
Flooring That Won’t Break Your Back (Or Your Budget)
Replacing flooring makes a huge difference, but can seem intimidating. After trying several options across different bathrooms, here’s my honest assessment:
Vinyl plank flooring has been my go-to for bathrooms. It’s fully waterproof, installs without special tools, and comes in styles that convincingly mimic wood or tile. My guest bathroom floor cost $165 and took one day to install.
Peel-and-stick vinyl tiles have come a long way! My sister used the high-quality ones ($1.89/sq ft) in her bathroom, and they’ve held up beautifully for two years. The key is the meticulously clean, level subfloor.
Ceramic tile delivers the most premium look but requires more skill and tools. For my master bathroom, I spent $280 on materials and borrowed a tile saw. The project took a full weekend plus some evening work.
The most common flooring mistake? Not removing the toilet first. I’ve seen people try to tile or install vinyl around the toilet base, and it always looks amateur. Take the extra hour to remove and reset the toilet—you’ll thank yourself later. For detailed instructions on installing vinyl flooring, check out the Flooring Manufacturer Installation Guide for step-by-step tutorials.
Vanity Makeovers: From Dated to Designer
Bathroom vanities typically account for the largest visual space in the room, so updating yours creates a major impact. You have several options:
Paint an existing vanity: The most budget-friendly route. My neighbor transformed her orange oak vanity with gray chalk paint and new hardware for under $75. The prep is crucial here—clean thoroughly with TSP, sand lightly, and use a good primer before your paint.
Replace just the countertop: If your vanity cabinet is solid but the top is dated, consider replacing just the top. I found a remnant piece of marble for $150 that completely transformed a basic vanity.
Install a new vanity: Pre-assembled vanities from home improvement stores start around $200. I replaced my guest bath vanity with an off-the-shelf model, and it took about 4 hours, including the removal of the old one. The trickiest part was adjusting the plumbing connections to match the new configuration.
The best tip I received was to take photos of your plumbing connections before disconnecting anything. This saved me multiple trips to the hardware store when reinstalling! For more detailed guidance, our article on How to Select the Right Vanity covers everything from measurements to styles.
Tub and Shower Updates Without the Contractor
Completely replacing a tub or shower typically exceeds most DIY budgets, but you can dramatically improve what you have:
Reglazing/refinishing: For about $200 in materials, you can refinish a stained or discolored tub. I was skeptical, but my friend’s DIY refinishing kit transformed her 1950s pink tub to white, and it’s held up well for over a year. This requires excellent ventilation and careful preparation.
New caulk and grout: Never underestimate how much dingy caulk and grout age your bathroom. Removing old caulk and replacing it with fresh white lines made my shower look brand new for under $10. It’s tedious work, but the payoff is huge. This Old House offers an excellent tutorial on caulking techniques that I found invaluable during my project.
Install a new showerhead: An upgraded showerhead costs $25-75 and transforms your shower experience. I installed a rainfall showerhead with a handheld combo, and it makes my basic shower feel like a spa.
Shower doors vs. curtains: If you have old, cloudy shower doors, consider removing them and switching to a curtain. My neighbor’s bathroom instantly felt larger and brighter after we removed the dated frosted doors and hung a simple white curtain.
Shopping Strategies for Your DIY Bathroom Makeover on a Budget
After several bathroom projects, I’ve developed a system for finding quality materials without paying full retail prices.
The Hidden Gems of Discount Shopping
My best bathroom finds have come from:
Habitat for Humanity ReStore: I found a brand-new vanity sink for $30 (retail $120) and vintage brass hardware that adds character to my modern design.
Floor model sales: Home improvement stores regularly discount their display models. My main bathroom vanity was 40% off because it was a floor sample with minor scratches on the side that faces the wall, anyway.
Closeout tile sections: Look for odd lots or discontinued styles. For my backsplash, I found premium marble tile for $4/sq ft (down from $18/sq ft) because it was a discontinued pattern.
Online marketplace and neighborhood groups: I’ve picked up everything from barely used towel rings to a brand-new toilet (still in box) from local sellers upgrading their own bathrooms.
Scratch-and-dent appliance stores: These aren’t just for major appliances. I found a perfect vanity with a small dent on the back panel for 60% off retail.
The key is patience and flexibility. Having a general style in mind while remaining open to what you find leads to the best deals. When I was set on one specific light fixture, I paid full price. When I was flexible about my vanity style, I saved over $200.
Sustainable and Upcycled Options That Look Amazing
Some of my favorite bathroom elements came from creative reuse:
- A vintage dresser converted to a vanity (just cut holes for plumbing and seal the wood)
- Old ladder repurposed as towel storage
- Mason jars as toothbrush and cotton ball holders
- Wooden crate mounted as wall storage
My friend turned a $15 thrift store cabinet into stunning bathroom storage with teal chalk paint and new hardware. It looks like an expensive boutique piece and provides better storage than any mass-produced option we found.
Mistakes I’ve Made During My DIY Bathroom Makeover on a Budget
I’ve made plenty of errors across my bathroom projects, and they’ve all taught me valuable lessons.
The “I Can Do It All In A Weekend” Delusion
My biggest mistake was underestimating time requirements. My first bathroom “weekend project” stretched to three weekends plus weeknight work. Now I double my time estimates and break projects into manageable phases.
For my second bathroom, I created a realistic schedule:
- Weekend 1: Prep and paint
- Weekend 2: Flooring
- Weekend 3: Vanity and fixtures
This approach kept the bathroom functional throughout most of the process and preserved my sanity.
The “This YouTube Tutorial Makes It Look Easy” Trap
I watched a 5-minute video on installing a bathroom faucet and thought, “That looks simple!” Two hours and multiple trips to the hardware store later, I learned that YouTube professionals edit out all the tricky parts.
Now I watch multiple tutorials before starting an unfamiliar task and look specifically for “common problems” or “mistakes to avoid” videos. The more prepared you are for what might go wrong, the smoother your project will go. For reliable plumbing advice, I highly recommend PlumbingSupply.com’s DIY Guides, which break down each step in detail.
Skipping Proper Prep Work
For my first painted vanity, I rushed the prep because I was excited to see the new color. Six months later, the paint was chipping. I had to sand it all down and start over.
Proper preparation—cleaning, sanding, priming—feels tedious, but it determines whether your project looks professional or amateur. Give yourself permission to spend 70% of your time on prep and 30% on the actual project.
Assuming Your Walls Are Square and Level
In older homes especially, nothing is perfectly square. I learned this when installing my floating shelves and finding they looked crooked despite my level showing they were perfect.
Always dry-fit materials before permanent installation, and use shims where needed to adjust for uneven walls or floors. Sometimes, visual alignment matters more than what the level says, especially in older homes with settled foundations.
Real Project Plans for Your DIY Bathroom Makeover on a Budget
Let me break down some actual bathroom makeovers with specific budgets and timelines.
Weekend DIY Bathroom Makeover: The $200 Budget Plan
This is perfect for renters or those on tight budgets. My friend Sara transformed her bathroom with:
- New shower curtain, rug, and towels: $65
- Paint (walls and cabinet): $45
- Updated hardware (towel bars, cabinet pulls): $50
- Framed mirror with trim pieces: $25
- New switchplate and outlet covers: $8
Total: $193
The entire project took one weekend, with most of the time spent painting. The bathroom looked completely different without changing any permanent fixtures.
The $500 DIY Bathroom Update Plan
This is what I did for my guest bathroom:
- Paint for walls and ceiling: $55
- New vanity light fixture: $85
- Basic white vanity with top: $230
- New faucet: $65
- Accessories (towel ring, toilet paper holder): $45
- Fresh caulk and painting supplies: $30
Total: $510
This took two weekends—one for painting and replacing the light fixture, and one for installing the vanity and finishing touches.
The Full DIY Bathroom Makeover: $1500 Budget Plan
My main bathroom got a more comprehensive overhaul:
- New luxury vinyl plank flooring: $265
- Mid-range vanity with stone top: $450
- Quality faucet and drain assembly: $120
- New toilet: $180
- Tiled shower niche and accent wall: $200
- Paint and supplies: $60
- Light fixture and mirror: $180
- Hardware and accessories: $75
Total: $1,530
This project took three weekends plus several evenings, with the flooring and vanity installation being the most time-consuming elements.
For Renters: Reversible DIY Bathroom Makeover on a Budget
When I was renting, I still managed to dramatically improve my bathroom without losing my security deposit.
The best renter-friendly updates that made a huge difference:
- Command strip hooks instead of drilling for towel holders
- Peel-and-stick wallpaper behind the toilet for an accent wall
- Tension rod shelving system for storage above the toilet
- Shower curtain with a bold pattern to distract from dated tile
- Washable rugs to cover ugly flooring
- Magnetic or adhesive storage accessories for inside cabinet doors
My landlord actually complimented my bathroom improvements when I moved out! The key is selecting changes that can be completely reversed when you leave.
If you’re looking for more ideas for rental-friendly updates, check out our related article on Budget Kitchen Renovation Ideas, which includes many reversible techniques that work for multiple rooms.
Frequently Asked Questions About DIY Bathroom Makeovers on a Budget
What is the cheapest way to redo a bathroom?
The absolute cheapest way to transform a bathroom is with paint, textiles, and hardware updates. For under $150, you can paint the walls, add a new shower curtain and towels, and update small hardware like towel bars and cabinet knobs. These changes alone can make a bathroom feel completely different without any major construction or plumbing work.
How much does a DIY bathroom makeover on a budget typically cost?
A DIY bathroom makeover can range from $200 for a basic refresh (paint, hardware, accessories) to $1500 for a more comprehensive update (new vanity, flooring, fixtures). The average budget bathroom makeover I’ve completed costs around $650, which typically includes paint, a basic vanity update, new light fixture, and updated fixtures.
Can I update my bathroom for under $500?
Absolutely! A $500 budget can cover paint, a basic vanity refresh or replacement, new fixtures, and updated lighting. The key is prioritizing high-impact changes and doing all the labor yourself. I’ve completed several bathroom updates for under $500 that transformed dated spaces into fresh, modern bathrooms.
What DIY bathroom updates give the biggest impact for the least money?
The highest return on investment comes from:
- Paint (walls and/or vanity cabinet)
- Updated lighting fixture
- New hardware (faucet, towel bars, cabinet pulls)
- Fresh shower curtain and towels
- Re-caulking around the tub, shower, and sink
These five changes can completely transform a bathroom for $300 or less.
How long does a typical DIY bathroom makeover take?
A basic refresh can be completed in a single weekend. A mid-range update (painting plus replacing a vanity or flooring) typically takes 2-3 weekends. A more comprehensive makeover involving multiple elements can take 3-4 weekends plus some weeknight work. Always allocate extra time for unexpected issues, especially in older homes where you might discover problems once you start removing fixtures.
Your DIY Bathroom Makeover on a Budget: Final Thoughts and Next Steps
After completing several bathroom makeovers of varying scopes, I’ve learned that the most important factor isn’t your budget or even your DIY skills—it’s thoughtful planning and realistic expectations.
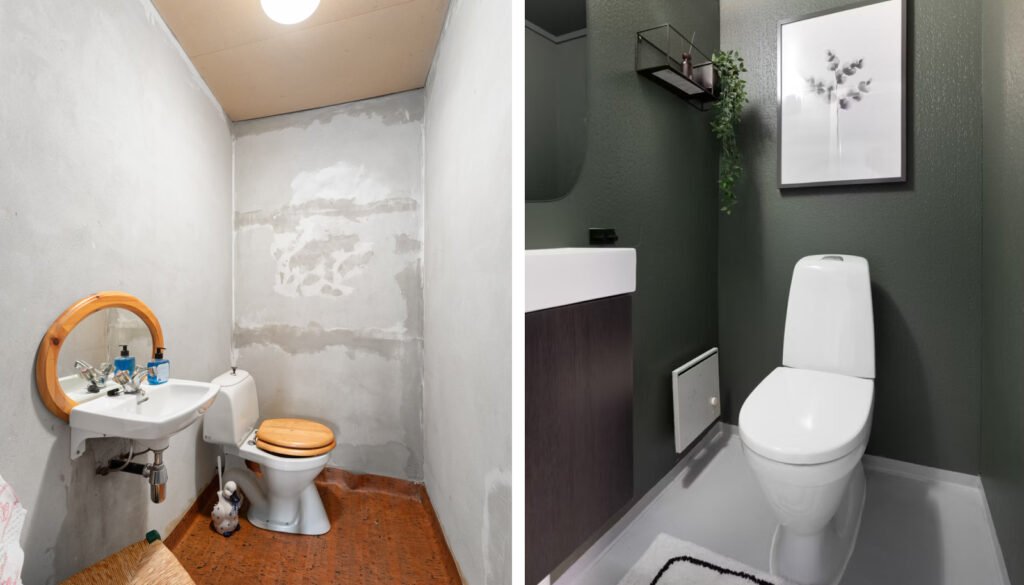
Start with the quick wins (paint, hardware, textiles) to build confidence before tackling bigger projects like flooring or vanities. Take plenty of “before” pictures; you’ll be amazed at the transformation when you look back.
Remember that your bathroom doesn’t need to be picture-perfect to be a significant improvement. Each of my bathroom projects had elements I’d do differently next time, but they all ended up vastly better than where they started.
What will you tackle first in your DIY bathroom makeover on a budget? Whatever you choose, take that before picture, make a concrete plan, and start with something manageable. Before you know it, you’ll have a transformed space you’ll be proud to show off—and you’ll have the satisfaction of knowing you did it yourself.
Feel free to email me pictures of your projects or questions about specific challenges—I love seeing what fellow DIYers accomplish!