
There’s something magical about watching a family of chickadees move into a home you built with your own hands. I still remember the flutter of excitement when I spotted the first bird checking out my handmade birdhouse – a simple project that took one Saturday afternoon but has provided years of joy. Whether you’re an experienced woodworker or just someone looking for a fun weekend project, building your birdhouse is surprisingly straightforward and incredibly rewarding.
Over the years, I’ve built more than a dozen birdhouses, each time learning something new about what makes our feathered friends feel at home. This guide combines what I’ve learned through plenty of trial and error, broken down into manageable steps that only a complete beginner can follow. Let’s create something special together!
Why Build Your Birdhouse?
Before we dive into sawdust and measuring, let’s talk about why building a birdhouse is worth your time. Beyond the obvious joy of seeing birds make a home in something you created, there are several compelling reasons:
- Support local wildlife: Many bird species face habitat loss as natural nesting sites disappear. Your simple wooden creation provides crucial breeding space.
- Educational opportunity: If you have kids (or even curious adults!), a birdhouse project teaches woodworking skills, bird behaviour, and patience.
- Sustainable hobby: Unlike many crafts that end up collecting dust, a birdhouse serves a practical purpose in your outdoor space.
- Customizable design: Unlike store-bought options, you can tailor dimensions to attract specific local bird species.
My neighbour Tom started with one birdhouse five years ago. Today, his backyard hosts 17 different houses, each designed for specific birds. He’s become our neighborhood’s unofficial ornithologist!
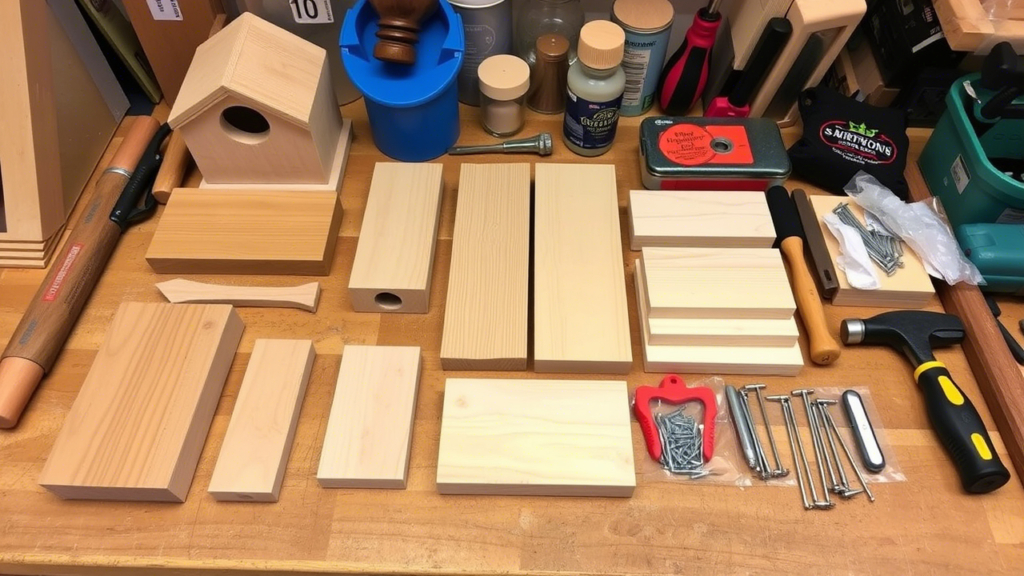
Materials You’ll Need
Here’s everything required to get started. Don’t worry if you don’t have all the specialized tools – I’ve included alternatives I’ve used when in a pinch:
- Wood: 1-inch thick untreated cedar or pine boards (about 4 feet total)
- My hack: I’ve repurposed old fence boards and even wooden pallets with great success
- Measuring tools: Tape measure and pencil
- Cutting tools: Handsaw or power saw
- If you’re saw-less: Many hardware stores will cut wood to your dimensions for a small fee
- Drilling equipment: Drill with 1½” hole bit (for entrance) and 1/8″ regular bit (for pilot holes)
- No hole saw? A spade bit works, or even careful work with a jigsaw
- Fasteners: Galvanized screws (1¼” length) or nails
- Important: Avoid regular steel fasteners as they’ll rust and potentially harm birds
- Finishing materials: Medium-grit sandpaper
- Optional: Wood glue, exterior-grade wood sealer (clear, non-toxic)
Cost estimate: If purchasing everything new, expect to spend $20-30. Using scrap wood or borrowed tools can bring this down to under $10.
Designing Your Birdhouse
The design of your birdhouse isn’t just about aesthetics – it directly affects which birds will use it. After building several houses that sat empty for seasons, I’ve learned different species have very specific requirements.
Common Backyard Birds and Their Preferences
Bird SpeciesEntrance Hole SizeFloor DimensionsMounting Height
Chickadees 1¼” 4″×4″ 6-15 feet
Wrens 1⅛” 4″×4″ 6-10 feet
Bluebirds 1½” 5″×5″ 5-10 feet
Nuthatches 1¼” 4″×4″ 12-20 feet
Titmice 1¼” 4″×4″ 6-15 feet
For your first birdhouse, I recommend designing for chickadees or wrens – they’re typically the least picky and most common visitors.
Basic Dimensions for a Standard Birdhouse
For a versatile birdhouse that works for multiple species, these dimensions have proven successful in my backyard:
- Front and back panels: 5½” × 8″
- Side panels: 4″ × 8″
- Floor: 4″ × 4″
- Roof: Two pieces approximately 6″ × 8″ (for a peaked roof)
- Entrance hole: 1¼” diameter, positioned about 6″ above the floor
These measurements aren’t sacred – birds don’t carry tape measures! My first birdhouse was slightly lopsided, and a family of wrens moved in within weeks.
Step-by-Step Building Instructions
Now for the fun part! Let’s break this down into manageable steps.
Step 1: Prepare Your Wood
- Measure and mark all pieces on your boards according to the dimensions above.
- Cut the pieces using your saw of choice.
- Sand all edges and surfaces, paying special attention to removing splinters. I’ve found that birds avoid houses with rough, splintery surfaces.
Pro tip: If using reclaimed wood, check thoroughly for old nails or staples before cutting!
Step 2: Create the Entrance Hole
- On your front panel, measure and mark a point centred horizontally and about 6″ from the bottom edge.
- Drill your entrance hole using the hole saw or spade bit.
- Lightly sand the entrance hole to remove any splinters.
Wisdom from experience: Unlike my first attempt, don’t place the hole too low – this makes the nest vulnerable to predators who can reach in.

Step 3: Add Ventilation and Drainage
Birds need good air circulation and a way for rainwater to escape:
- Drill four ⅛” holes near the top of both side panels for ventilation.
- Drill four ⅛” holes in the floor panel for drainage.
- Alternatively, you can set the floor panel ¼” up from the bottom edges of the walls to create a natural drainage gap.
My mistake story: I skipped this step on my first birdhouse. After a rainy spring, I found mould had developed inside – not ideal for baby birds!
Step 4: Assemble the Box
- Attach the side panels to the edges of the back panel using screws or nails.
- Secure the floor about ¼” up from the bottom edges of the sides and back (for drainage).
- Attach the front panel, making sure the entrance hole is positioned correctly.
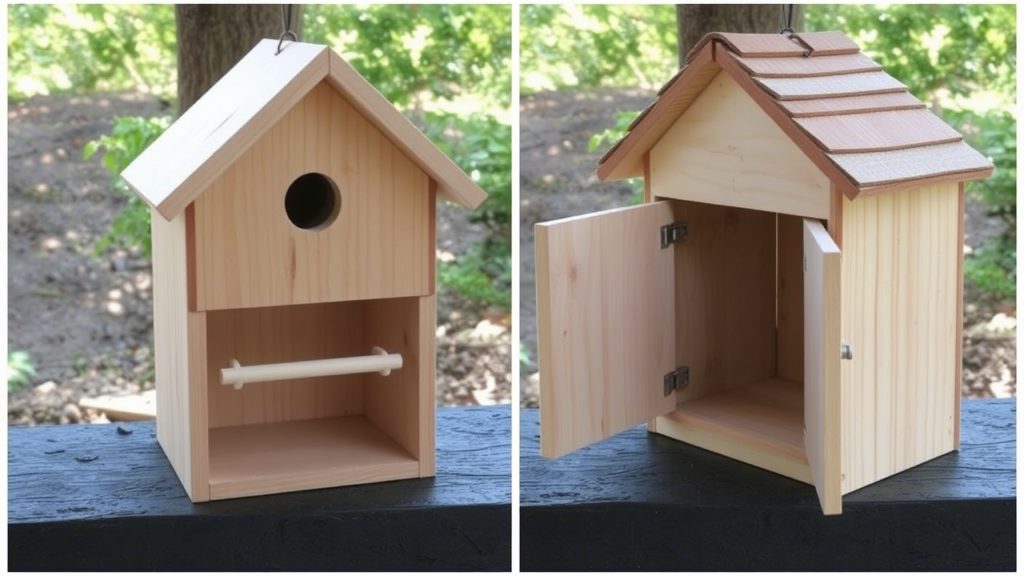
- For the roof, I like creating a simple peaked design:
- Attach one roof piece flush with the top of the back panel
- Attach the second piece overlapping the first at the peak, extending over the front for protection
Assembly tip: Pre-drilling holes prevent the wood from splitting, especially near edges. I learned this the hard way after cracking several pieces on my early attempts!
Step 5: Make It Accessible for Cleaning
A birdhouse needs yearly cleaning to remain habitable:
- Either attach one wall (usually the front) with a single screw at the top that works as a hinge
- OR attach the roof so it can be removed for cleaning
- Add a simple latch or removable nail to keep it closed securely
After watching abandoned nests attract parasites, I now clean all my birdhouses every fall – much easier when you’ve planned for accessibility!
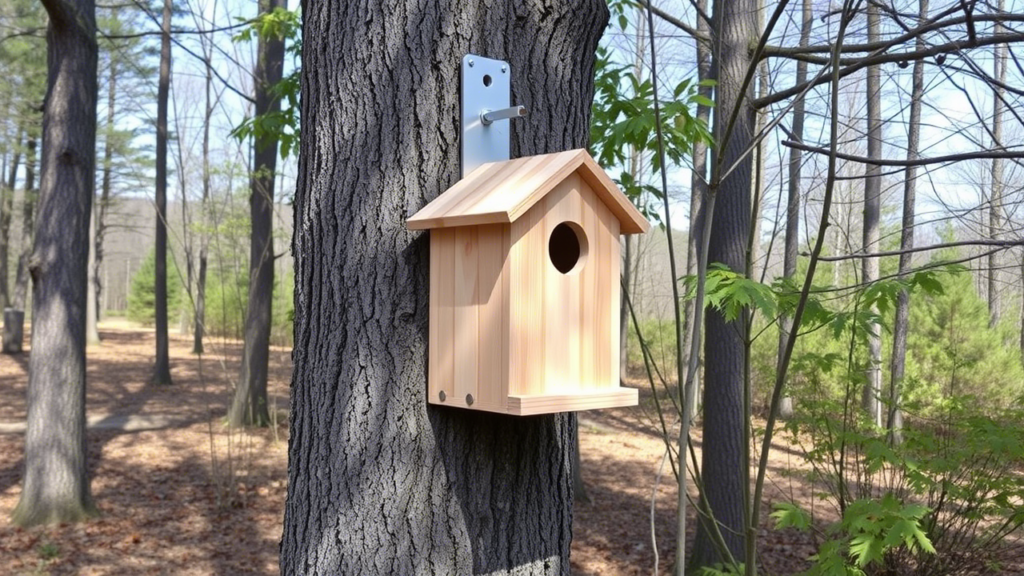
Proper Placement: Location Matters!
Where you place your birdhouse significantly impacts whether birds will use it. Through years of repositioning houses around my yard, I’ve learned these key principles:
Optimal Mounting Guidelines
- Height: Position the birdhouse between 5-15 feet off the ground (species dependent).
- Direction: Face the entrance away from prevailing winds, usually toward the east or southeast in most regions.
- Sunlight: Provide some morning sun but afternoon shade to prevent overheating. After cooking my first birdhouse in full southern exposure, I now use the “morning sun, afternoon shade” rule.
- Clearance: Keep the immediate area in front of the entrance hole clear for at least 3-4 feet.
- Protection: Some nearby branches (about 6-10 feet away) give birds a place to land before approaching the house.
- Predator protection: Mount on a metal pole with a baffle if cats or raccoons are common in your area.
- Spacing: If installing multiple houses, keep them at least 25 feet apart (most birds are territorial).
Personal insight: I originally mounted my first birdhouse on a tree, which looked picturesque but allowed squirrels and raccoons easy access. Switching to a metal pole increased occupancy dramatically!
Mounting Methods
- Pole mounting: My preferred method – uses a metal pole with a predator baffle
- Building mounting: Attached to shed or house wall (less ideal but works for wrens)
- Tree mounting: Most natural-looking but provides the easiest access for predators
- Fence mounting: Works well for wren houses
For any mounting method, ensure the house doesn’t swing or move in strong winds.
Maintaining Your Birdhouse
A well-built birdhouse can last many years with proper care:
Seasonal Maintenance Schedule
- Fall cleanup: Remove old nesting material after breeding season ends (usually October-November).
- Winter check: Inspect for damage from weather or animals before spring nesting begins.
- Spring readiness: Ensure the house is clean and secure by early February (earlier in warmer climates).
Personal routine: I mark “Birdhouse Day” on my calendar each October when I clean and repair all houses. It’s become a nice seasonal tradition that marks the transition to fall.
Cleaning Process
- Open your access point (removable roof or front panel).
- Remove old nesting material carefully (wear gloves – there might be parasites).
- Scrub interior with a mild solution of 1 part bleach to 9 parts water.
- Rinse thoroughly and allow to dry completely before closing up.
- Check for loose screws or damage and repair as needed.
Success Stories and Lessons Learned
I’ve gone from complete novice to backyard birdhouse enthusiast over the years. Some of my favourite memories include:
“The chickadee family that returns to the crooked little house my daughter helped build when she was six. Five years later, they still prefer it over the ‘perfect’ birdhouses I’ve built since!”
Learning from mistakes has been part of the journey:
- Birdhouse I painted bright blue that sat empty for two seasons (birds prefer natural wood tones)
- The oversized entrance hole that let starlings bully out native birds
- Mounting too close to my bird feeder, creating too much traffic
Through trial and error, each season brings new insights and feathered visitors.
Conclusion: More Than Just a Wooden Box
Building a birdhouse might take an afternoon, but the joy of watching birds make it their home lasts for seasons. My kids and I have now built seven different houses, each one a little different, and we keep a simple journal of which birds use them each year. There’s something profoundly satisfying about creating a habitat that helps local wildlife while connecting you more deeply to the natural world right outside your window.
If you build a birdhouse using these instructions, I’d love to see how it turned out! Please share a photo in the comments below or tag us on social media. And remember, even if your first attempt isn’t perfect, the birds are far more forgiving than you might expect. Happy building and even happier bird watching!
Frequently Asked Questions
Q: Do I need to paint or seal my birdhouse? A: You can, but it’s not necessary. If you do paint, use water-based exterior paint on the outside only, and stick to natural colours like green, brown, or grey. I leave mine natural – the cedar or pine weathers beautifully over time, and birds seem to prefer it.
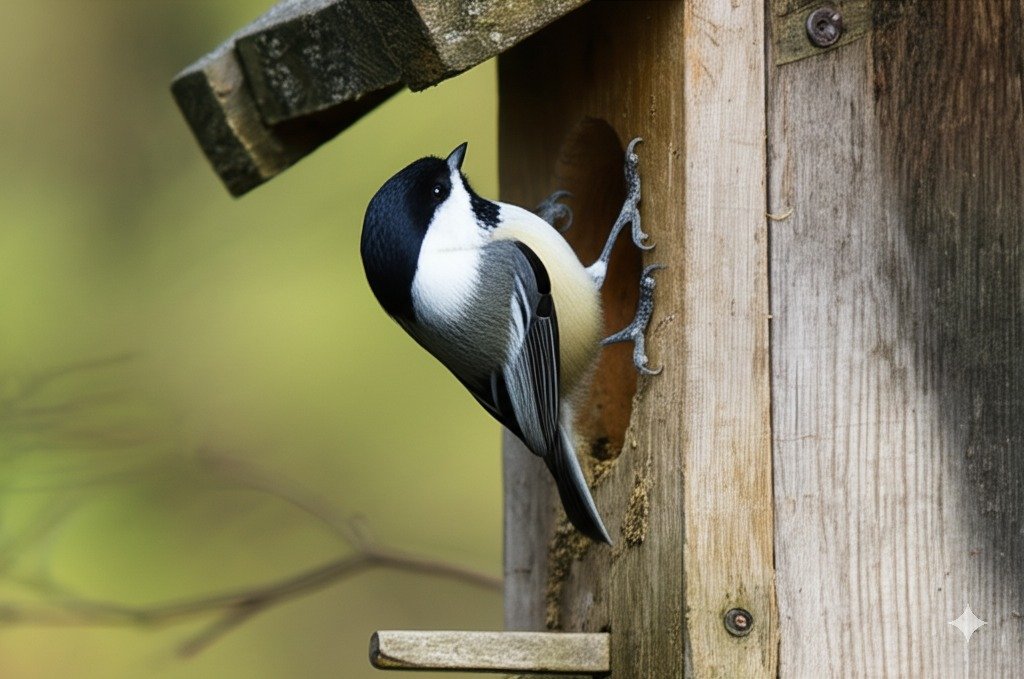
Q: How do I know if birds are actually using my birdhouse? A: Watch for birds carrying nesting materials (twigs, grass, feathers) into the house in spring. You might also see adults making frequent trips in and out while feeding young. Observe from a distance to avoid disturbing them.
Q: Can I put my birdhouse near my bird feeder? A: It’s better to keep nesting sites separate from feeding areas. Most birds prefer privacy when nesting, away from the activity of a busy feeder. I keep my houses at least 15-20 feet from feeders.
Q: My birdhouse has been up for weeks, but there are no birds. What’s wrong? A: Patience is key! It took nearly a full season before Birds found my first house. Make sure it’s not too close to busy areas or predator access points. Sometimes, moving it just 20 feet can make all the difference. Also, timing matters – houses should be up by early spring when birds are house-hunting.
Q: What should I do if predators are targeting my birdhouse? A: If cats, squirrels, or larger birds are harassing your birdhouse, consider installing a predator baffle on the mounting pole, making sure the entrance hole isn’t too large for your target species and positioning the house in a more protected location.