
Transform ordinary gifts into memorable treasures with handcrafted wrapping that shows you care. These paper craft techniques add a personal touch that mass-produced options simply can’t match.
Why Handmade Gift Wrapping Makes All the Difference
We’ve all been there, scrambling at the last minute to wrap a gift with whatever generic paper we can find stuffed in the back of the closet. I used to be that person every single holiday season until a disastrous Christmas Eve three years ago when I realized I had absolutely nothing to wrap my husband’s gift in. That night of panic-crafting with office paper and some markers completely changed how I approach gift presentation.
What started as a desperate solution turned into my favorite part of gift-giving. There’s something magical about watching someone’s face light up before they’ve even opened their present, simply because the wrapping itself shows thoughtfulness and care.
These DIY paper craft techniques aren’t just about making your gifts look prettier, though they do that! They’re about adding an extra layer of meaning to your giving. When you spend even just 15 minutes creating custom wrapping, you’re essentially giving two gifts: the item inside and the handcrafted presentation that shows how much you value the recipient.
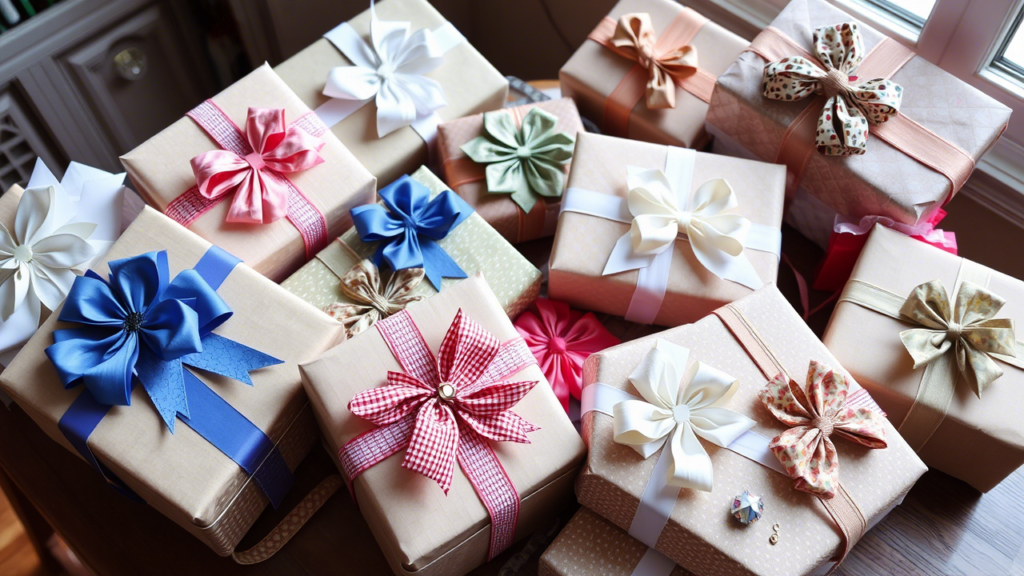
A collection of gifts wrapped using different paper craft techniques shows how varied the results can be even when using similar materials.
Essential Materials You Already Have at Home
Before you rush out to buy expensive supplies, take a look around your home. I bet you already have most of what you need to create stunning gift wrap:
Basic Supplies That Work Wonders
The best part about DIY paper craft gift wrapping is how accessible it is. You don’t need fancy equipment or expensive materials to create something beautiful. In fact, some of my most complimented gift wrap designs came from repurposed materials I was about to throw away!
Here’s what to gather:
- Old newspapers, magazines, or book pages (those damaged paperbacks finally have a purpose!)
- Brown paper grocery bags (seriously, these are gold for crafters)
- White printer paper or construction paper
- Basic school glue or a glue stick
- Scissors (sharp ones make a huge difference)
- Markers, colored pencils, or crayons
- String, yarn, or ribbon (even that tangled mess from last year’s gifts)
- Stamps and ink pads if you have them (but totally optional)
My neighbor Tom ignored my suggestion to use brown paper bags for wrapping his wife’s anniversary gift, insisting on buying “proper” wrapping paper. The next day, he sheepishly admitted that my simple kraft paper design with hand-drawn details looked far more special than his store-bought wrap.
Unexpected Items That Create Magic
Some of my favorite wrapping materials came from things I almost threw away:
- Used tea bags (dried thoroughly) make gorgeous aged paper effects
- Coffee filters create delicate flower-like decorations
- Potato chip bags (washed and turned inside out) offer a metallic silver surface
- Sheet music or maps from old atlases add visual interest
- Fabric scraps from outgrown clothes add texture
The day I discovered you could iron wax paper between layers of autumn leaves to create translucent decorations changed my gift-wrapping game forever.
7 Paper Craft Techniques That Will Transform Your Gift Wrapping
Now for the fun part! Let’s explore some specific techniques that will make your gifts stand out. I’ve arranged these from quickest and easiest to more involved, so you can choose based on how much time you have.
1. Japanese-Inspired Furoshiki Fabric Alternative
While traditional Furoshiki uses fabric, this paper version creates a similar effect with much less material:
- Take a large square of paper (newspaper works beautifully)
- Place your gift diagonally in the center
- Fold opposite corners over the gift
- Twist the remaining corners together to create a makeshift handle
I used this technique for my sister’s birthday present last month, using the comics section from Sunday’s paper. She laughed for five solid minutes when she saw Charlie Brown’s face peering up at her, and she actually carefully unwrapped it to save the paper!
This simple folding technique requires no tape or ribbon but creates a distinctive wrapped package.
2. Stamped Pattern Paper From Household Objects
Store-bought patterned paper is lovely but expensive. Make your own with simple stamps created from things in your kitchen:
- Cut potatoes into simple shapes (stars, hearts, circles)
- Use wine corks for perfect little circles
- The eraser end of pencils makes tiny dots
- Lego pieces create geometric patterns
Press these into a basic ink pad or brush with diluted food coloring, then stamp onto plain paper. I once wrapped all my holiday gifts in white butcher paper stamped with little trees made from broccoli florets dipped in green paint. My family still talks about it years later!
3. Upcycled Paper Bows That Pop
Those plastic stick-on bows always look cheap to me. Create your own dimensional paper bows that actually look handcrafted and special:
- Cut 8-10 strips of paper, about 1″ wide and 11″ long
- Loop each strip and secure it with a tiny dot of glue
- Arrange the loops in a circular pattern
- Secure with a small circle of paper in the center
The first time I made these, they took about 10 minutes each. Now I can whip one up in 2 minutes flat. My niece once asked if she could keep “just the bow” from her birthday present – success!
4. Personalized Hand-Lettered Wrapping
This technique works wonderfully with simple brown kraft paper or even plain white printer paper:
- Wrap your gift in solid-colored paper
- Use markers to write words all over it – you can include:
- The recipient’s name in different styles
- Words that describe them
- Inside jokes or memories you share
- Song lyrics they love
My husband still has the birthday gift I wrapped for him, where I covered the entire package with tiny handwritten stories of all our favorite memories together. He said unwrapping it was like reading a love letter.
5. Layered Paper Flowers and Accents
Create dimensional decorations that transform plain wrapping:
- Cut simple flower shapes from different colors of paper
- Layer them together, slightly offsetting each layer
- Secure with a small brad or button in the center
- Attach to your wrapped package
After making these for gifts, my daughter asked if we could create a whole wall of paper flowers in her room. We now have a stunning feature wall that costs less than $5 in materials but looks like something from a high-end design magazine.
These dimensional paper flowers can be made in any color scheme and add a professional-looking touch to simple wrapping.
6. Wax-Resist Secret Message Wrapping
This technique creates a magical reveal moment:
- Use a white crayon to write secret messages or draw designs on white paper
- Dilute watercolor paint or food coloring with water
- Wash the colored water over the paper
- Watch as your hidden messages appear!
The look on my best friend’s face when she realized the seemingly random blue watercolor wash on her gift actually revealed “Happy 40th Birthday” in hidden wax writing was absolutely priceless. She thought I’d bought it from a specialty store until I showed her how simple it was to create.
7. Origami Pocket Gift Toppers
Instead of a traditional bow, create a functional origami pocket:
- Fold a square of decorative paper into an origami pocket
- Tuck in a gift card, concert tickets, or a special note
- Attach the pocket to your wrapped gift
Last Christmas, I used this technique to hide clues for a scavenger hunt that led my kids to their main gift. They were so excited about the interactive wrapping that they almost forgot about the present itself!
Personalization Tips That Make Your Wrapping Meaningful
The techniques above will make your gifts look beautiful, but the true magic happens when you personalize the wrapping to reflect the recipient’s personality or your relationship.
Incorporate Their Interests
My football-obsessed nephew nearly fell over when he saw his birthday gift wrapped in paper I’d created by printing and collaging images of his favorite team’s players. It took me 10 minutes longer than regular wrapping would have, but his reaction was worth every second.
Consider using:
- Sheet music for musicians
- Map pages for travelers
- Recipe pages for cooks
- Comic strips for the humor-loving friend
Add Sensory Elements
Gift wrapping can engage more than just the visual sense:
- Spritz wrapping paper with their favorite essential oil
- Add textural elements like soft yarn or rough twine
- Include elements that make gentle sounds when handled
My mom’s face lit up when she unwrapped a gift and caught the faint scent of lavender – her favorite – that I’d lightly sprayed on the tissue paper.
Common Mistakes to Avoid
Through years of experimenting with DIY gift wrapping, I’ve made plenty of mistakes, so you don’t have to:
Using Too Much Glue
My first attempt at paper flowers turned into a sticky disaster because I used too much glue. It seeped through the paper, creating unsightly wet spots and making the colors run. Now, I use a glue stick or just the tiniest dot of liquid glue.
Forgetting to Consider the Gift’s Shape
I once created elaborate paper wrapping for a soft plush toy, only to have all my careful creases and folds collapse because there was nothing solid to support them. Consider the gift’s structure when choosing your technique.
Making It Too Precious to Open
The point of gift wrap is that it will be opened! My cousin once created such an intricate paper-filled design on a package that the recipient was reluctant to “ruin” it by unwrapping their gift. Beautiful is good; unopenable is not!
Final Thoughts: Why Handmade Wrapping Matters
In our world of digital connections and instant everything, taking time to create something by hand carries special significance. Your DIY paper craft gift wrapping does more than disguise the contents – it communicates care, thoughtfulness, and personal connection.
Remember, it’s not about crafting perfection. Some of my most memorable gift wrap creations were beautifully imperfect – complete with smudged ink, slightly crooked cuts, and imprecise folds. These “flaws” are actually signatures of handmade work and make your gifts feel authentic and special.
The next time you reach for that roll of generic wrapping paper, consider trying one of these paper craft techniques instead. I promise both you and your recipient will find more joy in the experience.
FAQ: DIY Paper Crafts for Gift Wrapping
How much extra time does DIY gift wrapping take? Most of these techniques add just 5-15 minutes to your wrapping time. The simpler methods like hand-lettering or stamping can be even quicker once you’ve gathered your materials.
What if I’m not artistic or crafty? You don’t need artistic talent! Simple techniques like using newspaper instead of wrapping paper or adding a sprig of greenery tied with twine can look stunning with zero artistic skill required.
Can kids help with these paper craft techniques? Absolutely! Children as young as three can help with stamping or decorating paper. School-aged kids can usually manage most of these techniques with a little guidance. It’s a wonderful way to make gift-giving a family activity.
How do I store large pieces of DIY wrapping paper? Roll your custom paper around an empty paper towel tube and secure it with a rubber band. For smaller pieces, store them flat in a large folder or between the pages of a large book to keep them from wrinkling.
What do I do if I make a mistake while creating my wrapping paper? Incorporate the mistake into your design! Smudges can become intentional shading, and misplaced stamps can be turned into patterns. Some of my most creative designs started as “fixes” for mistakes.