
Creating custom photo albums isn’t just a craft project—it’s a journey through your most precious memories. I’ve spent years perfecting these techniques, and I’m excited to share them with you today.
Introduction: Why DIY Photo Albums Matter
Let’s be honest—we all have thousands of photos sitting on our phones that rarely see the light of day. I was guilty of this, too, until my grandmother passed away, and I realized how few physical photos we had to remember her by. That’s when I fell down the rabbit hole of DIY photo albums.
There’s something magical about flipping through physical pages, feeling the textures, and seeing your memories arranged in a way that tells your unique story. In a world of digital everything, a handcrafted photo album becomes an heirloom, something tangible that can be passed down for generations.
Not to mention, creating one yourself means you can customize every single element. No more settling for bland store-bought albums that don’t capture your personality or the spirit of your memories!
Materials You’ll Need: Getting Started Without Breaking the Bank
Before diving into various techniques, let’s talk about what you’ll need. Don’t worry—you don’t have to spend a fortune at craft stores (though it’s tempting, I know from experience!).
Essential Supplies
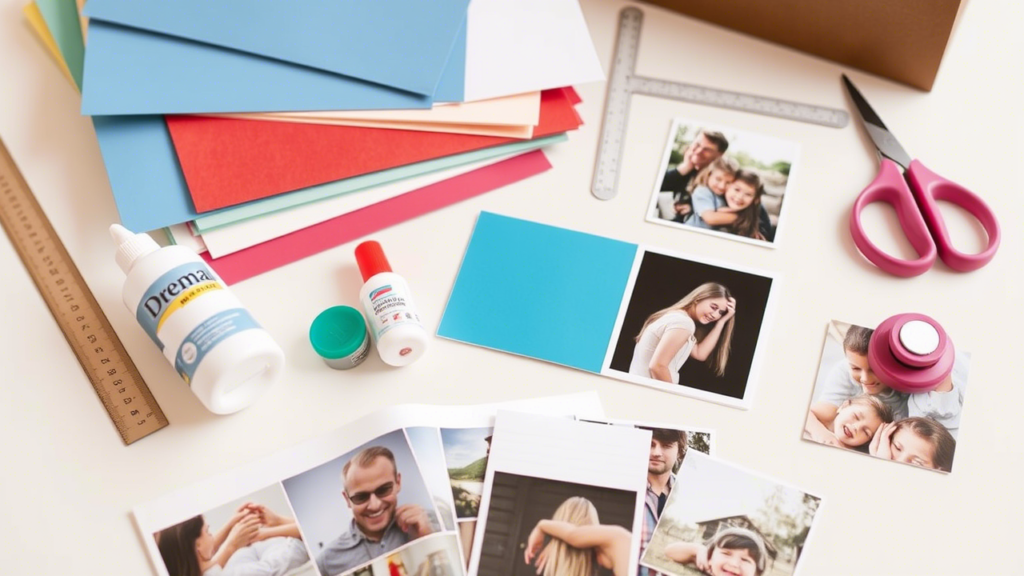
For your first DIY photo album, gather these basics:
- A blank album or scrapbook (I recommend starting with a ring-bound one for flexibility)
- Acid-free paper in various colors and patterns
- Photo-safe adhesive (regular glue can damage photos over time—learned this the hard way!)
- Scissors and/or paper trimmer
- Ruler and pencil
- Your printed photos (obviously!)
Nice-to-Have Extras
If you’re feeling a bit more adventurous or already have some crafting experience, consider adding:
- Washi tape in complementary patterns
- Rubber stamps and archival ink
- Stickers or die-cuts related to your theme
- Calligraphy pens for handwritten journaling
- Decorative borders or corner punches
My favorite tool is actually a simple paper distresser I picked up at a garage sale for $2. It gives pages that vintage, lived-in look that makes albums feel instantly nostalgic.
Choosing Your Theme: The Framework for Your Story
Before sticking down a single photo, think about the story you want to tell. Are you documenting a specific event like a wedding or vacation? Creating a year-in-review? Making a themed collection of family recipes with photos?
Your theme will guide everything from color choices to layout designs. When I made my son’s baby album, I chose a color scheme based on his nursery—soft greens and blues with pops of yellow. This created a cohesive look even though the photos spanned his first year with changing seasons and settings.
Some popular theme ideas include:
- Chronological life events (baby’s first year, school years)
- Travel adventures (one album per trip or a collection of journeys)
- Seasonal celebrations (holiday traditions through the years)
- Family heritage (generational photos with family stories)
- Relationships (friendships, romantic partnerships)
Whatever theme you choose, stick with it throughout the album for a professional, cohesive result.
Basic Layout Techniques: Creating Visual Flow
Now for the fun part—actually arranging your photos! This is where many beginners get stuck, wondering how to make their pages look polished and intentional rather than random.
The Rule of Thirds
You might know this photography principle, but it works for scrapbooking, too! Mentally divide your page into nine equal sections (like a tic-tac-toe board). Place your focal point photos at the intersection of these lines rather than dead center. This creates more visual interest and movement across the page.
I struggled with this at first—my instinct was always to center everything. But once I started following the rule of thirds, my pages instantly looked more professional.
Layering for Dimension
Flat pages can look boring. Create visual interest by layering elements:
- Start with a background paper
- Add a slightly smaller mat in a complementary color behind your photo
- Position your photo at a slight angle
- Add embellishments that slightly overlap the edges
The slight dimension makes your pages feel more tactile and interesting. Just be careful not to go overboard—too many bulky elements make it hard to close your album!
White Space is Your Friend
Don’t feel compelled to fill every inch of the page. Some of my most elegant layouts have plenty of breathing room around the focal elements. This is especially important when you’re including journaling or written memories alongside your photos.
One technique I love is creating a clean border around the entire layout by using a background paper that’s 1/2 inch smaller than your album page. This frames your entire design and gives it a polished look.
Adding Personal Touches: Beyond Just Photos
What separates a generic photo album from a treasured keepsake is the personal details you include. Here’s where your album becomes truly one-of-a-kind.
Meaningful Journaling
Don’t just show what happened—tell the story behind the photos. Who was there? What were you feeling? What funny thing happened right before or after the picture was taken?
I’m not naturally a journaler, so I developed a system: I jot quick notes on my phone right after taking important photos, capturing details I might forget later. These become perfect little captions when I finally create the album pages, even months later.
For my parents’ anniversary album, I included quotes from their wedding vows alongside photos from both their wedding day and their anniversary celebration 40 years later. The contrast between the young, hopeful couple and the seasoned partners they’d become was powerful, and the words tied everything together beautifully.
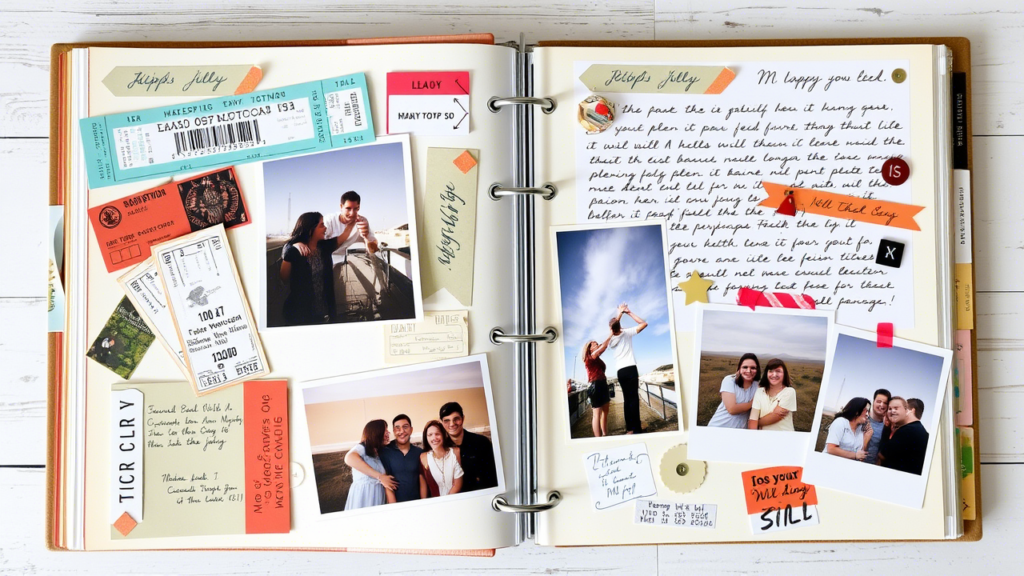
Including Memorabilia
Photos tell one part of the story, but physical mementos add another dimension entirely:
- Ticket stubs from concerts or movies
- Maps from hikes or road trips
- Pressed flowers from special occasions
- Handwritten notes or cards
- Fabric swatches from important outfits
For these non-flat items, create pockets or envelopes within your album pages. I use simple techniques like folding and gluing cardstock to create custom-sized pouches that match my layout.
When I documented our cross-country move, I included a small envelope with sand from our last beach day in California. Years later, that tactile element still brings back memories more vividly than photos alone ever could.
Creative Techniques for Standout Pages
Ready to take your album beyond the basics? These techniques create wow-worthy pages that showcase your most special memories.
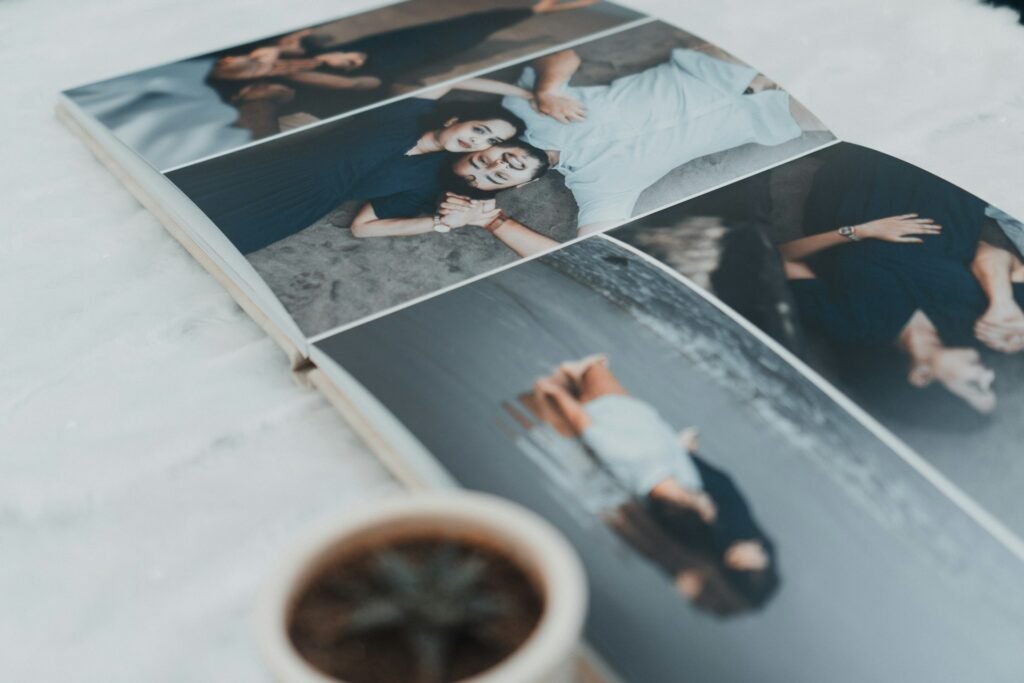
Photo Collages with a Twist
Instead of simply arranging multiple photos on a page, try creating a:
- Photo mosaic (tiny photos arranged to create a larger image)
- Timeline progression (showing changes over time)
- Before and after comparison
- Photo strips mimicking old-school photo booths
For my sister’s graduation album, I created a collage in the shape of her graduation year using tiny photos from throughout her school years. It took forever (seriously, like three episodes of my favorite podcast), but it became the centerpiece of the entire album.
Interactive Elements
Who says albums have to be static? Create pages that invite interaction:
- Fold-out extensions for panoramic photos
- Lift-the-flap revelations
- Pull tabs that slide to reveal hidden journaling
- Mini-books within your album for detailed stories
My nieces and nephews go straight for the interactive pages whenever they look through our family albums. Their favorite is a “guess who” page where baby photos are hidden under flaps, with the grown-up versions visible. It turns album-browsing into a game!
Mixed Media Experimentation
Don’t limit yourself to just paper and photos. Consider incorporating:
- Watercolor backgrounds
- Fabric elements
- Pressed botanical specimens
- Hand-stitched details
- Texture mediums like modeling paste
Just be sure that any unusual materials are acid-free and won’t damage your photos over time. When in doubt, place the photo on top of the mixed media element rather than vice versa.
Common Mistakes to Avoid: Learn From My Fails
I’ve made plenty of scrapbooking blunders over the years. Save yourself the heartache by avoiding these common pitfalls:
Using Non-Archival Materials
Not all adhesives, papers, and pens are created equal. Using the wrong materials can cause your photos to yellow, fade, or even disintegrate over time. I learned this lesson the hard way when some of my early albums started showing damage after just a few years.
Always look for products labeled “acid-free,” “archival quality,” or “photo-safe.” They might cost a bit more, but your future self will thank you when your albums still look fresh decades from now.
Overcrowding Pages
I used to think more was better—more photos, more embellishments, more everything! But overcrowded pages are visually confusing and don’t give your special photos the spotlight they deserve.
Instead, be selective. Choose the best 2-4 photos for each page rather than trying to cram in everything. If you have lots of similar shots, consider creating a photo pocket to store the extras rather than featuring them all prominently.
Neglecting to Back Up Digital Files
Even though we’re creating physical albums, always maintain digital backups of your photos. I’ve heard too many heartbreaking stories of albums being damaged in floods or fires, with no way to recreate the memories.
I keep all my photos organized in dated folders with cloud backups. This also makes it easy to reprint anything if I make a mistake while creating a page.
Conclusion: Starting Your Album Journey
Creating DIY photo albums isn’t just about preserving memories—it’s about interacting with them, celebrating them, and tangibly sharing them. The time you invest in crafting these albums transforms simple photos into storytelling treasures that can be enjoyed for generations.
Don’t get overwhelmed by thinking you need to create perfect, magazine-worthy pages from the start. My first album was pretty basic, but it still brings me joy when I flip through it. Your skills will develop with each page you create.
The most important thing is just to begin. Print those photos languishing on your phone, gather some basic supplies, and start telling your story, one page at a time. Trust me—in the future, you (and your family) will be so grateful you did.
Have you created DIY photo albums before? I’d love to hear about your experiences or answer any questions in the comments below!
FAQ: Your DIY Photo Album Questions Answered
How long does it take to create a complete DIY photo album?
This varies widely depending on the complexity of your designs and the number of pages. A simple 20-page album with basic layouts might take 10-15 hours spread over several weeks. More elaborate albums can be ongoing projects spanning months. I typically work on my family’s annual album in small sessions throughout the year, then finish it during the winter holidays.
Where should I print my photos for the best quality?
While convenient, home printing often doesn’t yield archival-quality results. I’ve found that online services like Mpix, Nations Photo Lab, or Persnickety Prints offer excellent quality scrapbooking. Local camera shops can also provide high-quality prints with personalized advice. Avoid drugstore kiosks for any photos you care deeply about preserving long-term.
How can I create a photo album if I’m not naturally artistic?
Pre-designed scrapbook kits are perfect for beginners! These include coordinated papers and embellishments that work together seamlessly. Alternatively, start with simple grid layouts (arranging photos in clean lines) and minimal decoration. Remember, the photos and stories are the stars—elaborate designs are optional.
What’s the best way to organize photos before starting an album?
I recommend sorting photos chronologically first, then thematically within periods. Before printing, create digital folders or collections of the images you plan to use together on album pages. Edit them as a batch for consistent color and brightness. This preparation makes the actual album creation process much smoother.
Can I combine digital scrapbooking with physical albums?
Absolutely! Many crafters create layouts digitally and then print them as complete pages to insert into physical albums. This hybrid approach gives you precise control over design elements while still resulting in a tangible album you can hold and share. It’s particularly useful for creating multiple copies of the same album (for example, family yearbooks for relatives).