
What Is Mixed Media Art and Why Try It?
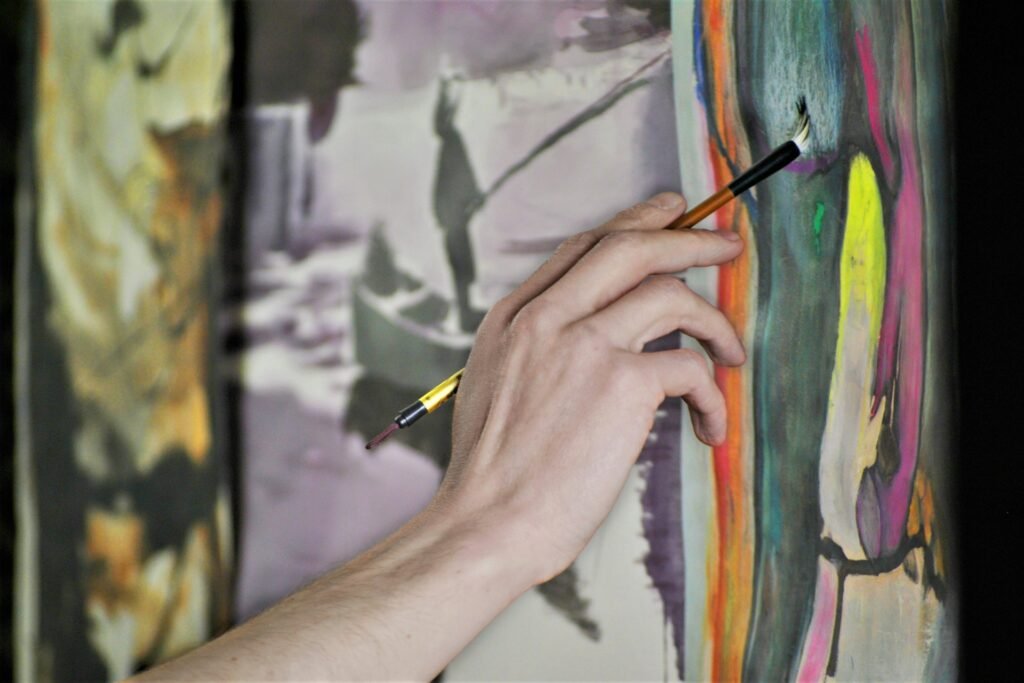
Mixed media art has completely transformed how I approach creativity. After spending years feeling confined to single mediums like watercolor or acrylics, I discovered that combining different materials opens up endless possibilities. Mixed media art simply means using more than one medium in a single artwork—think combining paint with paper, fabric with wood, or photographs with drawing.
What I love most about mixed media is the freedom it gives you. Did you make a mistake with your paint? No problem! Cover it with collage elements or transform it into a textured area. When I first started, I covered a painting error with torn book pages, and it became the most interesting part of my piece!
Mixed media art also lets you break free from the “rules” of traditional art. There’s no right or wrong way to combine materials, making it perfect for both beginners (who aren’t yet constrained by artistic conventions) and experienced artists (who want to push boundaries).
The History and Evolution of Mixed Media Techniques
Mixed media isn’t just a modern trend—it has rich historical roots dating back to Pablo Picasso and Georges Braque’s cubist collages in the early 1900s. They revolutionized art by gluing newspaper clippings and other materials onto their paintings, challenging the very definition of what art could be.
The 1960s brought another massive wave of mixed media exploration with artists like Robert Rauschenberg, who combined painting with sculpture, photography, and found objects. His famous “combines” blurred the lines between different art forms and everyday items.
“Painting relates to both art and life… I try to act in the gap between the two.” — Robert Rauschenberg.
Today’s mixed media artists have taken these foundations and run with them, incorporating digital elements, recycled materials, and even interactive components. I’ve been amazed watching artists on Instagram transform trash into treasure using mixed media techniques that would make Rauschenberg proud!
Essential Materials for Mixed Media Art Projects
When I first dove into mixed media art, I went a little overboard buying supplies (my craft room still hasn’t recovered). Let me save you some money and storage space by sharing what you actually need to get started:
Foundation Materials:
- Heavy paper (140lb watercolor paper or mixed media paper)
- Canvas (primed or unprimed, depending on your project)
- Wood panels
- Heavyweight cardboard
Adhesives:
- Matte medium (my personal favorite—works as both glue and sealer)
- PVA glue
- Gel medium (heavy gel for dimensional effects)
- Double-sided tape
Color Media:
- Acrylic paints (student grade is fine for beginning)
- Watercolors
- Oil pastels
- Alcohol inks
- Spray inks
Collage Elements:
- Old books or magazines
- Decorative papers
- Fabric scraps
- Found objects (buttons, bottle caps, etc.)
- Photographs
Budget-Friendly Mixed Media Supplies for Beginners
When my friend Sarah wanted to try mixed media art but was on a tight budget, I helped her create this starter kit for under $30:
| Essential Item | Budget Option | Approximate Cost |
|---|---|---|
| Adhesive | School glue + water mixture | $3 |
| Color media | Craft acrylics (small set) | $10 |
| Surface | Cereal box cardboard (primed with gesso) | Free! |
| Texture elements | Junk mail, old magazines, tissue paper | Free! |
| Basic tools | Dollar store paintbrushes + old gift card (for spreading) | $5 |
| Finishing | Mod Podge (seals and protects) | $5 |
The most valuable tip I’ve learned is to look around your home first. Old tickets, packaging, fabric scraps, and even dried flowers can become exciting elements in your mixed-media projects.
5 Exciting Mixed Media Art DIY Projects to Try Today
After teaching mixed media workshops for three years, I’ve found these five projects work beautifully for beginners while offering enough depth for experienced artists to enjoy.
1. Step-by-Step Mixed Media Canvas Project
This project combines acrylic painting with collage and texture to create a layered, visually interesting piece that tells a story.
You’ll need:
- Canvas (8×10″ is manageable)
- Acrylic paints in 3-4 colors you love
- Old book pages or decorative paper
- Matte medium or PVA glue
- Paintbrushes
- Optional: stencils, stamps, texture tools
Process:
- Start with a base layer of color on your canvas—don’t worry about perfection! My first attempt had brush strokes everywhere, and it ended up adding fantastic texture.
- Once dry, tear or cut paper pieces and adhere them to create an interesting composition. I like using text that relates to my theme for added meaning.
- Partially cover these papers with translucent paint washes, allowing bits of text or pattern to show through.
- Add a focal point using more defined painting, stencils, or drawn elements. This is where your personal style really shines!
- Build dimension with additional layers of paper, paint, and mark-making. Sometimes, I’ll add 10+ layers before I’m satisfied.
- Seal your creation with a final coat of matte medium to protect all elements.
What makes this project special is how each layer interacts with the previous ones, creating depth and visual interest that’s impossible to achieve with just paint alone.
2. Creating Textured Journal Covers with Mixed Media
Transform a plain notebook into a tactile art piece you’ll be excited to write in every day!
After my basic sketchbook got soaked in a surprise rainstorm, I decided to recover it using mixed media techniques. The result was so much better than the original, and I’ve been customizing all my journals since then.
The simple approach:
- Cover your journal with gesso or thick white paint to create a base
- Build layers using tissue paper, book pages, and lightweight fabrics
- Add details with stamps, stencils, and hand-drawn elements
- Seal thoroughly with multiple coats of medium (especially along the spine and edges)
For extra durability, I recommend leaving the inside covers plain or covering them with decorative paper only—texture elements can make the book hard to open flat.
3. Mixed Media Photo Transfer Techniques
This technique still feels like magic every time I do it! Transfer your photos onto different surfaces for a weathered, artistic effect.
I discovered this method when trying to incorporate family photos into a heritage-themed art piece. The slightly imperfect, dreamlike quality of the transfers created exactly the nostalgic mood I wanted.
Two methods I’ve found reliable:
Gel medium transfer:
- Apply gel medium to your surface
- Place a laser-printed or photocopied image face-down
- Burnish thoroughly and let dry completely (overnight is best)
- Gently wet the paper and rub away to reveal the transferred image underneath
Solvent transfer:
- Place your printed image face down on your surface
- Apply blending solution or xylene (use in a well-ventilated area!)
- Burnish the back of the image firmly
- Lift to reveal an instant transfer
The transferred images become part of the surface rather than sitting on top, allowing you to continue adding mixed media elements around and over them.
Advanced Mixed Media Techniques to Elevate Your Art
Once you’ve mastered the basics, these techniques will take your mixed media art to the next level:
- Embedding objects: Create wells with thick gel medium to permanently secure three-dimensional elements like small stones, shells, or metal pieces.
- Sculptural techniques: Build dimensional surfaces using modeling paste, paper clay, or air-dry clay before adding color and detail.
- Layered resin: Pour thin layers of resin between mixed media elements for a glass-like, dimensional effect. (My first attempt was a sticky disaster until I learned to work in a dust-free environment!)
- Image transfers on unusual surfaces: Apply the photo transfer techniques to wood, metal, or fabric for surprising results.
- Encaustic incorporation: Combine mixed media with beeswax for luminous, archival artwork.
Incorporating Found Objects in Mixed Media Compositions
Found object art turns everyday items into meaningful artistic elements. After cleaning out my grandmother’s house, I couldn’t bear to throw away her collection of vintage buttons and keys—instead, they became central elements in a series of memory-themed mixed media pieces.
When incorporating found objects:
- Consider the weight and durability—heavy items need serious adhesives
- Look for objects that have personal meaning or enhance your theme
- Create secure attachment points using wire, strong adhesives, or mechanical fasteners
- Balance three-dimensional elements with flat areas for visual contrast
The most successful found object pieces I’ve seen maintain a coherent theme or color palette despite using diverse materials. Without this unifying approach, the artwork can look cluttered rather than intentional.
Displaying and Preserving Your Mixed Media Creations
Mixed media art requires special consideration for longevity. Unlike traditional paintings, mixed media pieces often contain elements that can fade, warp, or detach over time.
After spending weeks on an intricate mixed media piece only to have elements fall off during an exhibition, I learned these preservation lessons the hard way:
- Sealing is essential: Use appropriate sealers for different components, such as flexible mediums for fabric and paper-specialized sealers for metal.
- Consider archival quality: When creating pieces you want to last, use acid-free papers and adhesives.
- Display away from direct sunlight: UV damage affects mixed media particularly quickly.
- Frame with spacers: Create distance between your artwork and the glass to prevent sticking
- Document your process: Take photos of your work in case restoration is ever needed.
For three-dimensional works, display cases or shadow boxes offer protection while highlighting the textural elements that make mixed media so compelling.
FAQs About Mixed Media Art
Q: Can I use regular school glue for mixed media art? A: While school glue works for basic paper collages in mixed media art projects, it may not hold heavier elements and can yellow over time. I recommend matte medium or PVA glue for better longevity and versatility.
Q: How do I fix a mixed media piece if parts start to come loose? A: For loose elements in mixed media art, carefully clean the area, apply appropriate adhesive (gel medium for paper, E6000 for heavier objects), and press firmly with weight until completely dry, potentially overnight, depending on materials.
Q: Can I combine oil paint with other mixed media materials? A: Yes, but with caution! When using oil paint in mixed media art, apply it last after all water-based materials have completely dried, as oil can prevent proper adhesion and drying of water-based mediums underneath.
Q: How do I prevent my mixed media pieces from warping? A: To prevent warping in mixed media art, start with a sturdy substrate (like wood panel instead of paper), apply wet mediums evenly on both sides when possible, and use weights while drying. For paper-based works, I’ve found that stretching the paper first makes a huge difference.
Q: What’s the best way to start if I feel intimidated by mixed media? A: The best way to start mixed media art if you’re feeling intimidated is to begin with a simple collage using magazine images and basic acrylic paint. Don’t aim for perfection—embrace the experimental nature and allow yourself to play without judgment. My first pieces were truly awful, but they led to discoveries I still use today!